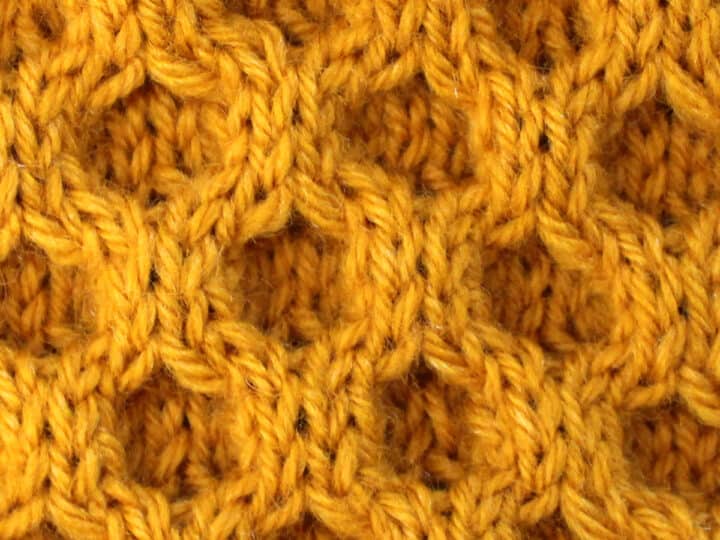
How to Knit Reversible Cable Ribbles
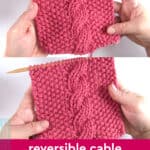
Learn how to knit Reversible Cable Ribbles with this easy technique. Have you ever wished your cable patterns looked identical on both sides of your work?
Ribbles are double-sided rib stitch cable textures. They look great in scarves and blankets, no matter which side is showing.
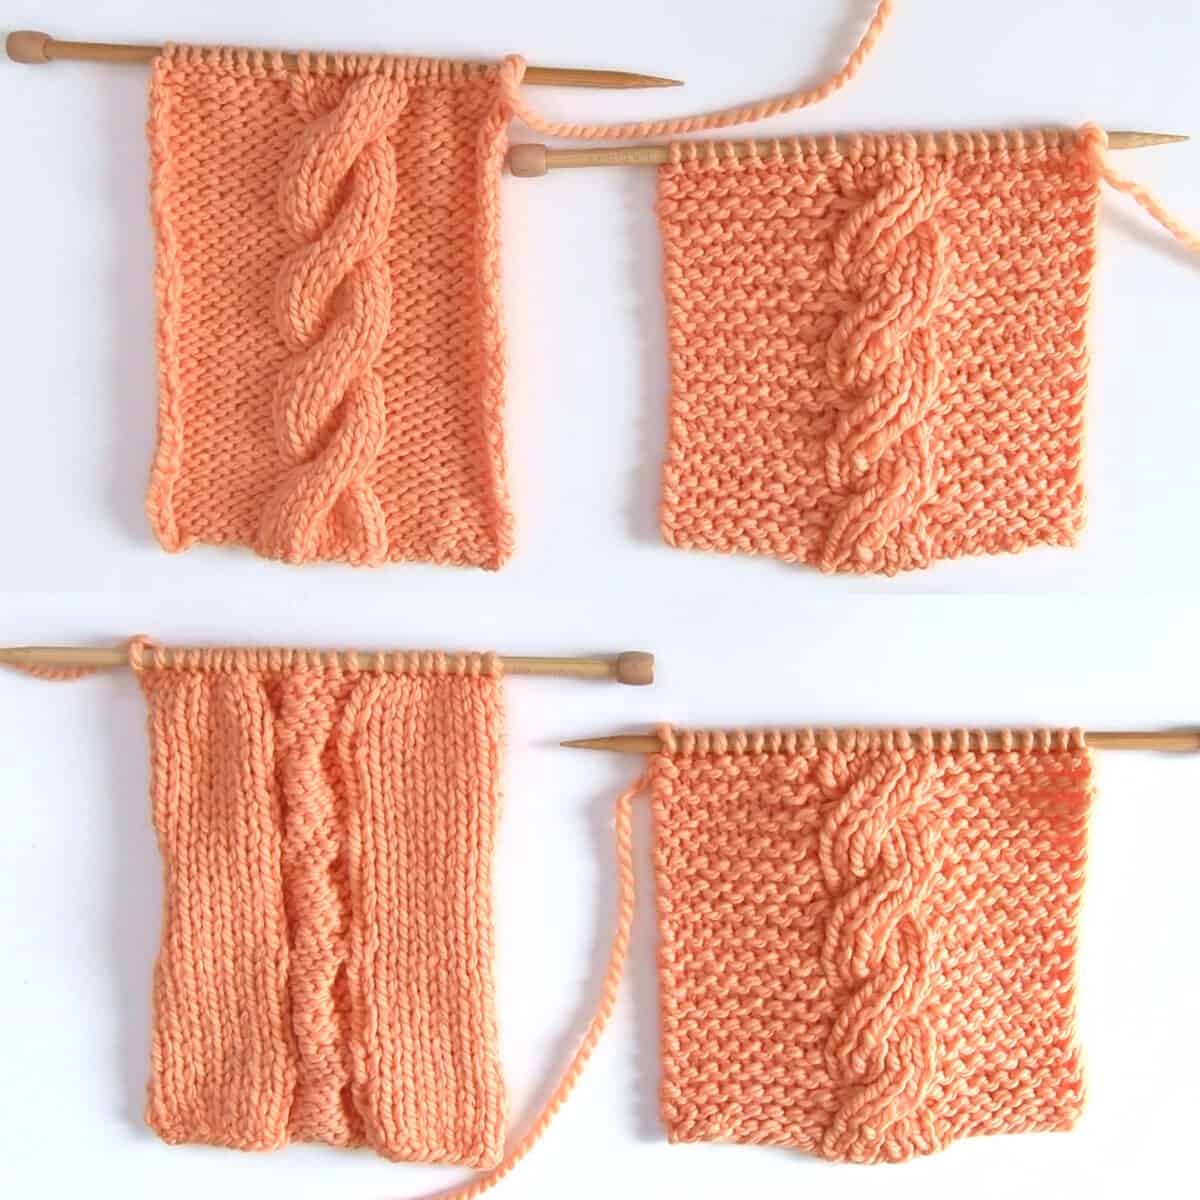
Table of Contents
We will first take a look at a standard rope cable, then see how to modify it as a reversible design with sample variations. Once you see the basic construction of double-sided cables, I hope you’re inspired to knit up your own swatches and knit new project designs!
About Reversible Cable Knitting
What are Ribbles?
- RIBBLES = RIB + CABLES
- This ribbing technique creates a reversible cable texture, pulling in the stitches with purl stitches hidden within the knit stitches on both sides.
Project Ideas
Because this pattern is visually identical on both sides, reversible cables are a great choice for scarves and blankets that typically show the right and wrong sides during use.
Reversible Ribbed Cable Stitches
- The samples are knitted in the 4/4R cable stitch, which is a technique with four stitches crossing right over the next four stitches.
- Rather than knitting all stitches as we do in many standard cables, we will be using the 1×1 stitch to create our reversible cable samples.
- To modify standard cable stitches into a double-sided texture, it is preferable to choose even-numbered techniques such as 2/2, 4/4, or 6/6 cables. It is possible to make reversible cables with an odd number of stitches, but they will not look quite as symmetrical.
Reversible Backgrounds
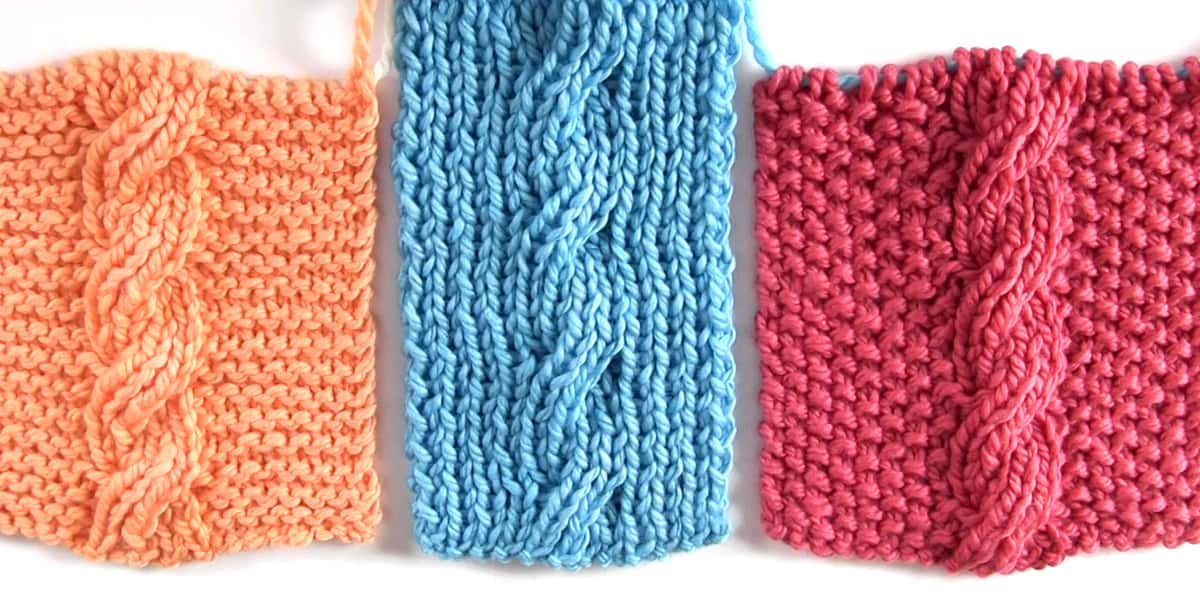
- Not only are our ribbed cables reversible, but the background texture is a design that shows identically on both sides.
- Sample patterns are knitted in the following reversible knit stitch backgrounds: Garter, 1×1 Rib, and Seed.
Placing Stitch Markers
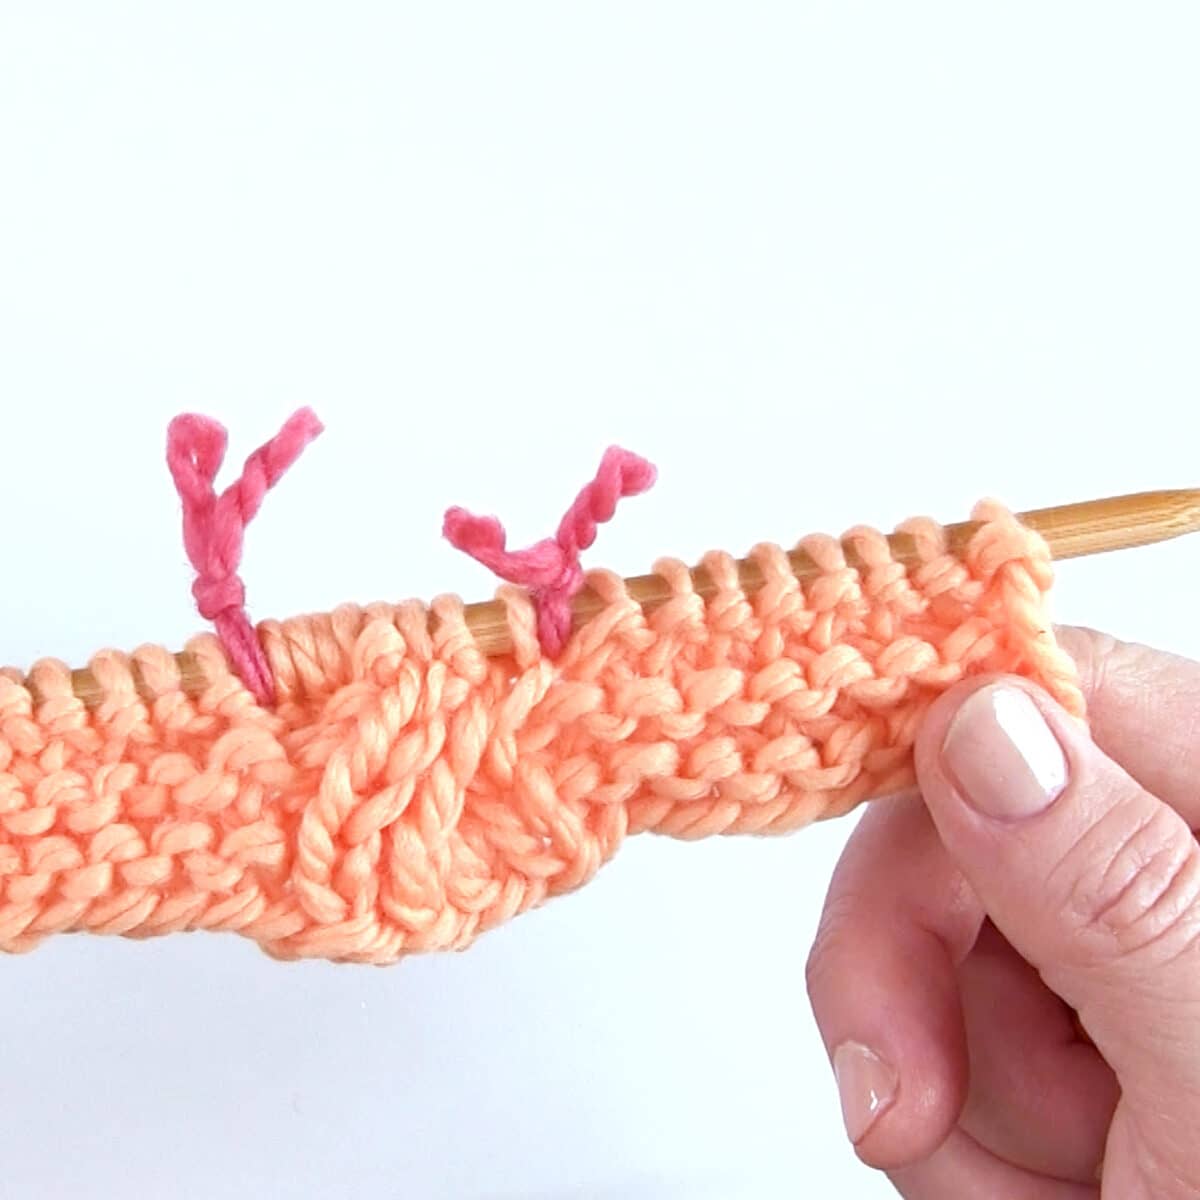
- It’s helpful to place stitch markers on either side of your cable section.
- This allows you to best keep track of the location of your background stitches and cable texture as you knit row-by-row.
- I simply use little scraps of yarn to mark my stitch sections… so easy and free!
Watch Video Tutorial
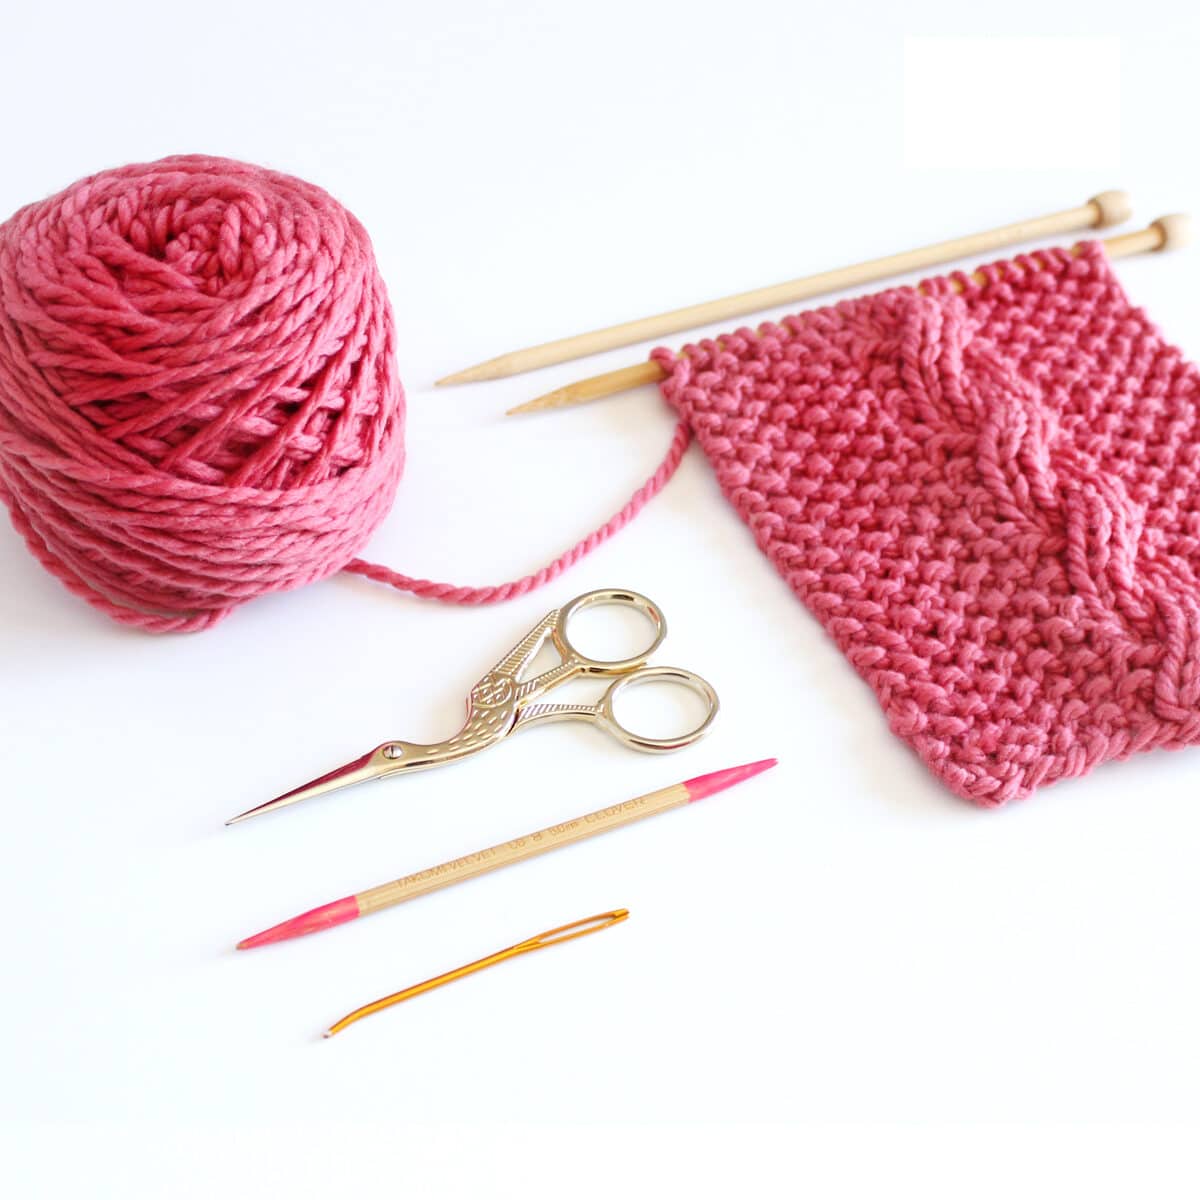
Knitting Supplies
As an Amazon Associate, I earn from qualifying purchases.
Feel free to use any size yarn and needles for your creative project. My samples were knit in Cascade 128 Superwash yarns with size 10 US knitting needles. For my cable needle, I simply use a short double-pointed needle.
- Yarn – Any gauge
- Knitting Needles – Appropriately sized for your yarn
- Cable Needle
- Tapestry Needle
- Scissors
Sample Cable Knitting Patterns
The following swatch samples include both written and charted pattern instructions, along with close-up photos of their right and wrong sides.
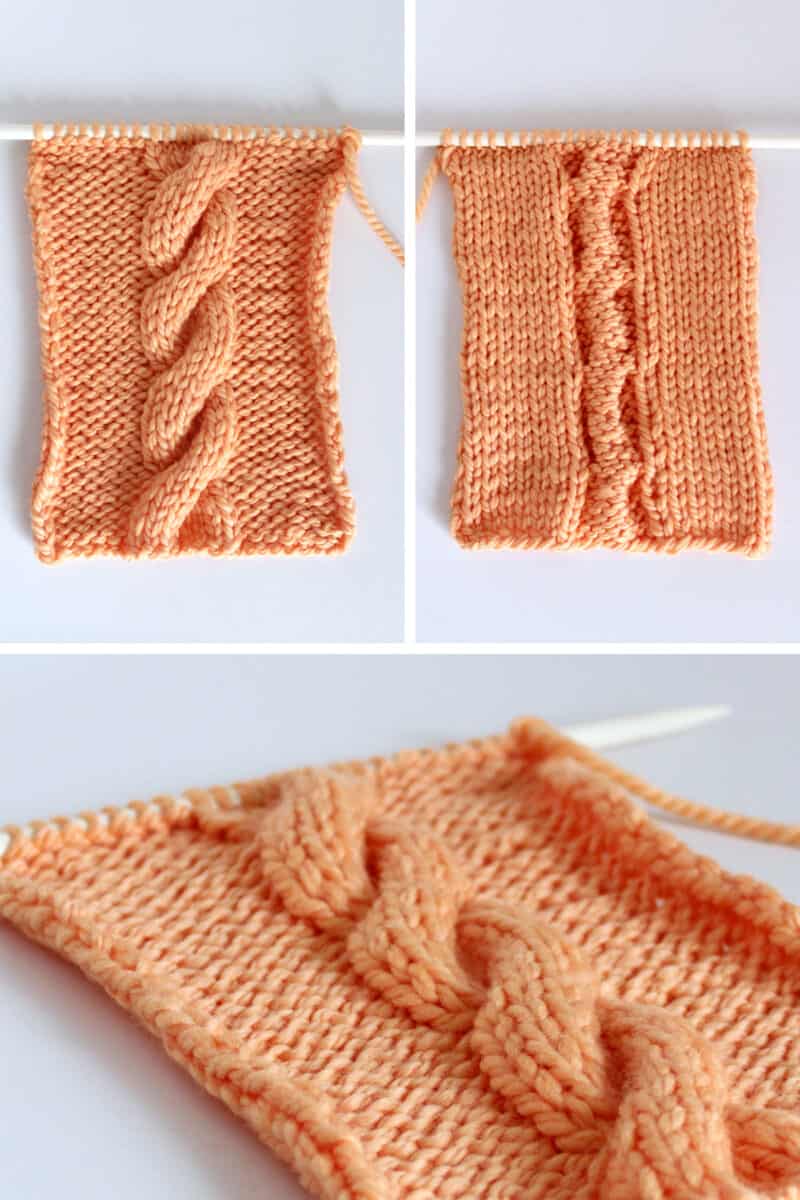
ONE-SIDED: 4/4R Cable Stockinette Stitch on Reverse Stockinette Background
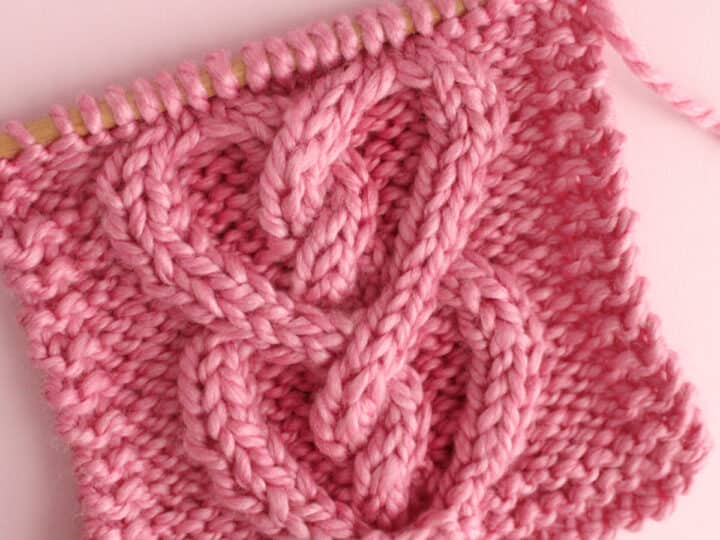
- To easily understand how to create double-sided cables, let’s first look at a standard one-sided pattern of an easy rope 4/4R cable design.
- You can easily see that this non-reversible cable stitch is knit in the smooth stockinette stitch with a visually distinct dimension.
- The cable stitches are all knitted and its background is the reverse stockinette texture.
Knitting Instructions:
- Cast On: 24 Stitches.
- Rows 1, 3, and 7: P8, K8, P8
- Rows 2, 4, 6, and 8: K8, P8, K8
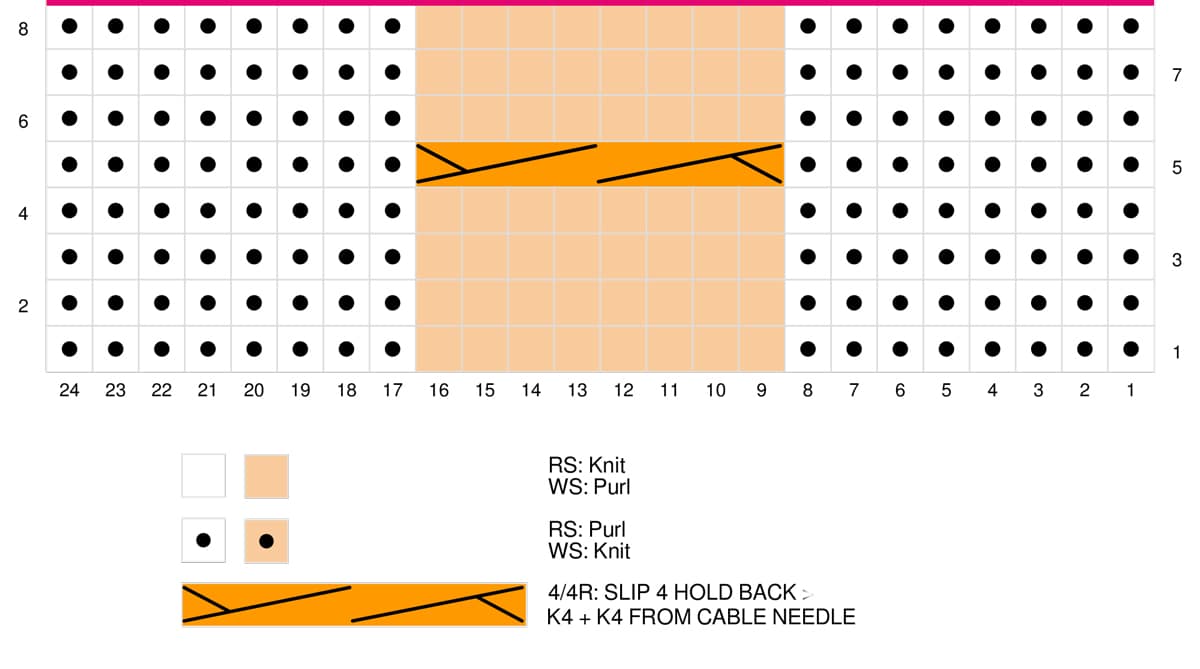
- Row 5: P8, 4/4R, P8
One-Sided 4/4R Knitting Instructions: Slip four stitches on your cable needle and hold back. Knit four stitches from your main needle, then knit four stitches from your cable needle.
Repeat Rows 1 – 8 to the length desired.
Knitting Chart:
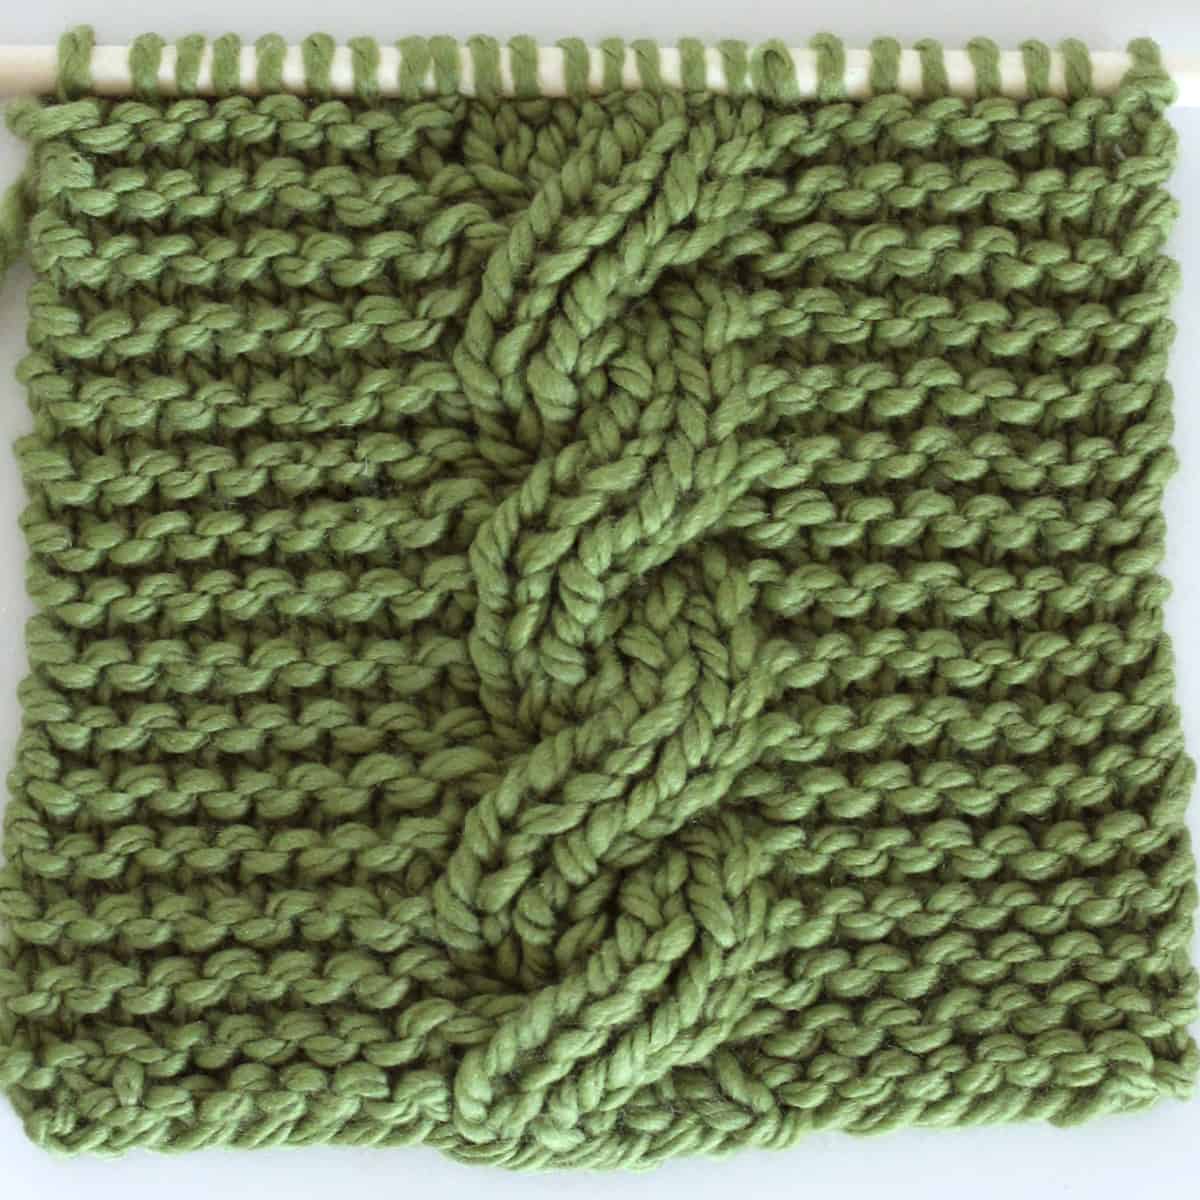
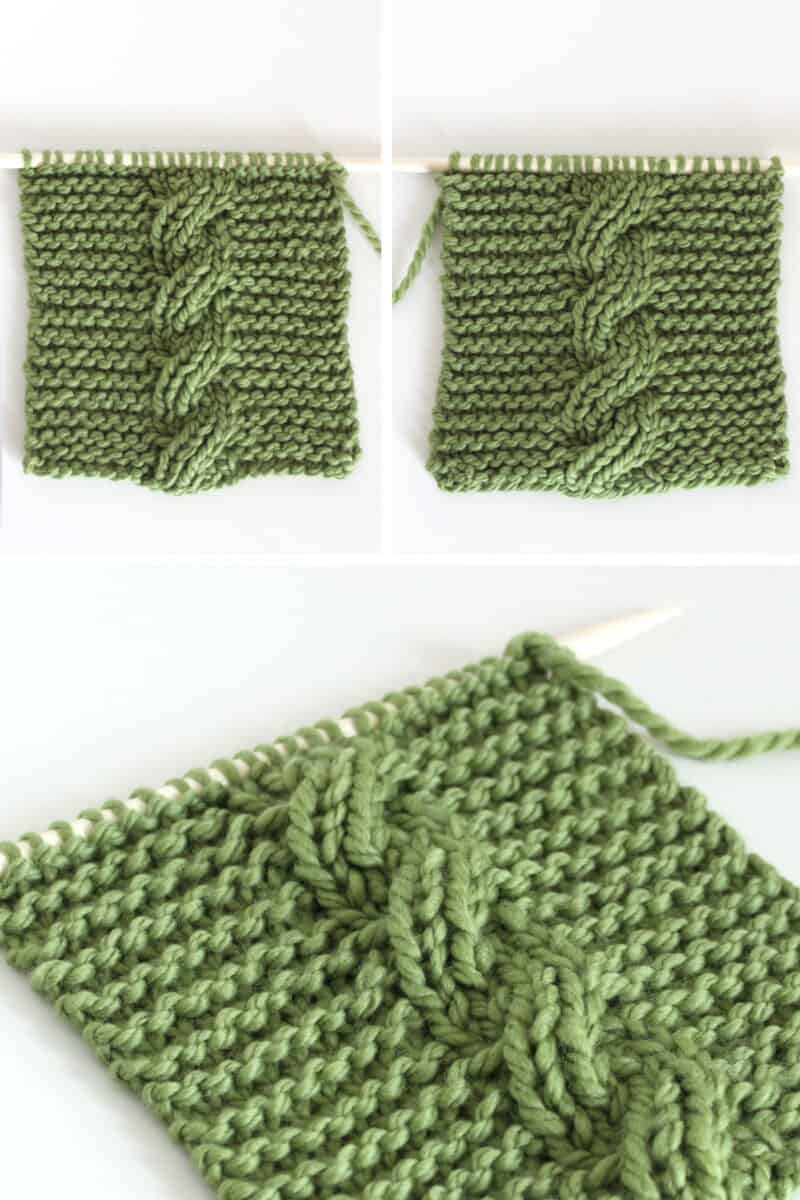
DOUBLE-SIDED: Reversible 4/4R Cable Stitch in 1×1 Rib on Garter Stitch Background
- Next, let’s look at a swatch knitted with the two-sided reversible cables for a 4/4R cable stitch.
- This reversible cable stitch is created with 1×1 ribbing and is less distinct.
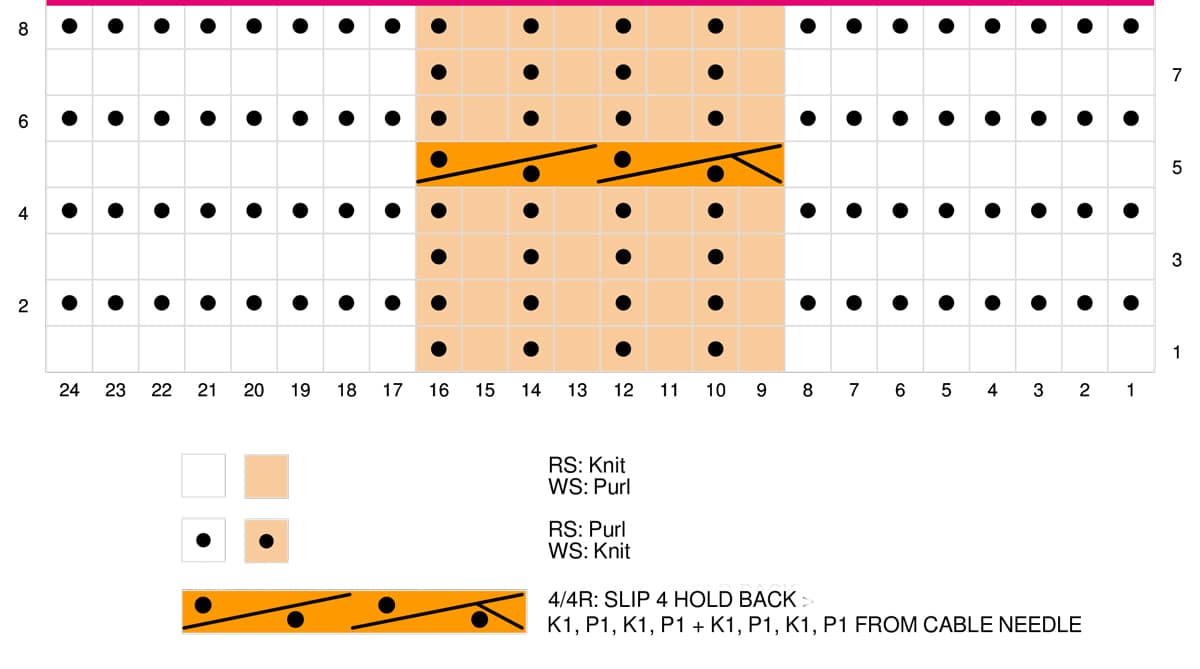
- Its background is the Garter Stitch texture.
Knitting Instructions:
- Cast On: 24 Stitches
- Rows 1, 2, 3, 4, 6, 7, 8: K8, K, P, K, P, K, P, K, P, K8
- Row 5: K8, 4/4R, K8
4/4R in 1×1 Rib Knitting Instructions: Slip four stitches on your cable needle and hold back. Knit four stitches of 1×1 ribbing (K1, P1, K1, P1) from your main needle, then four stitches of 1×1 ribbing (K1, P1, K1, P1) from your cable needle.
Repeat Rows 1 – 8 to the length desired.
Knitting Chart:
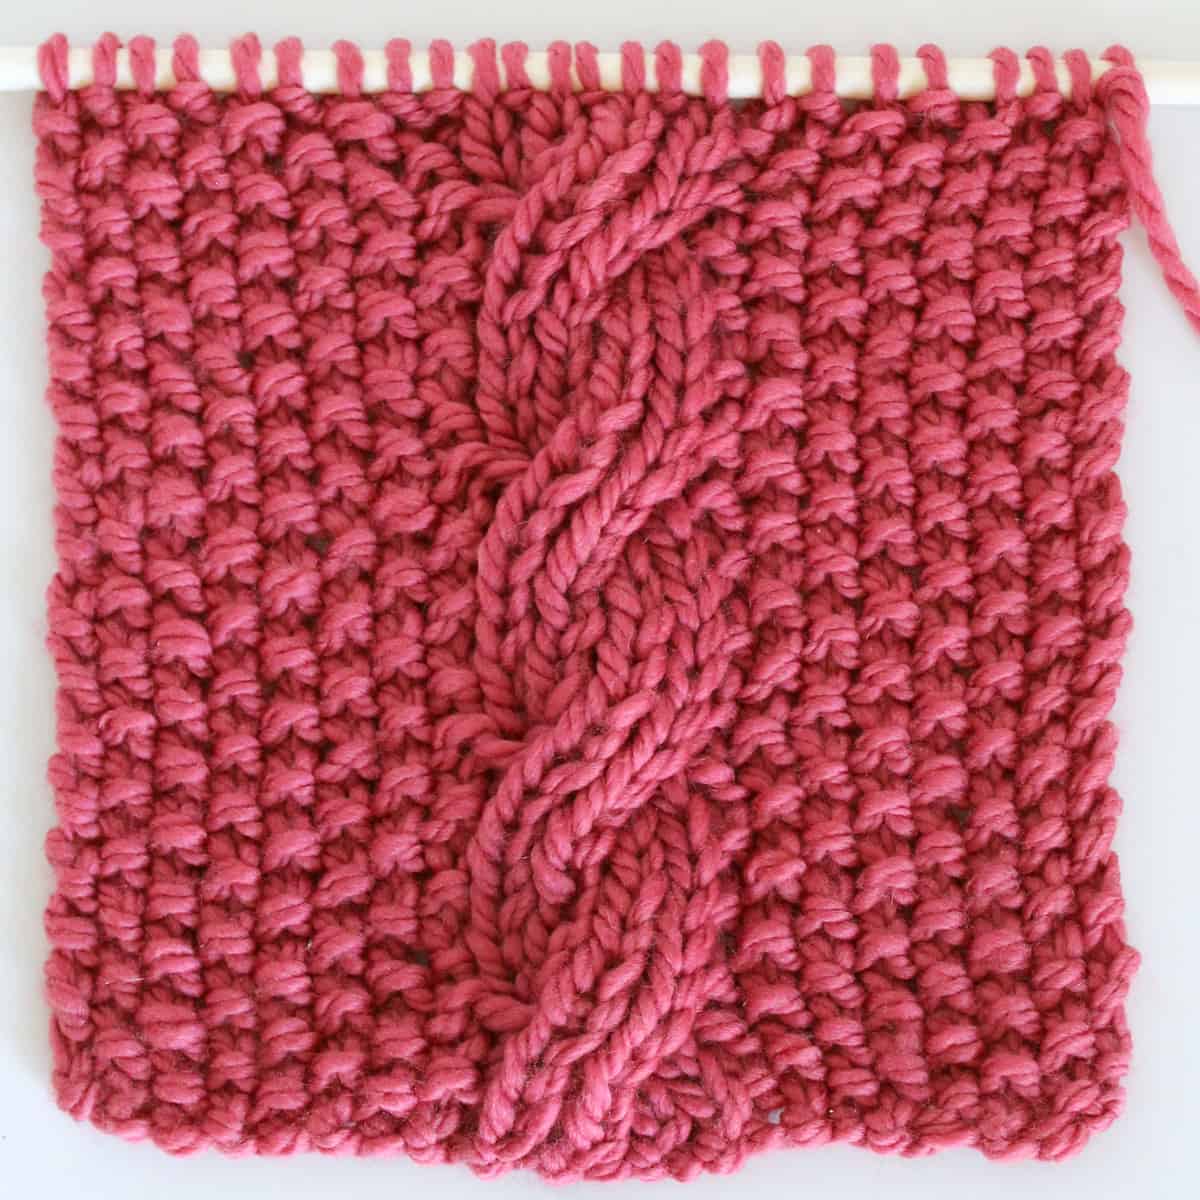
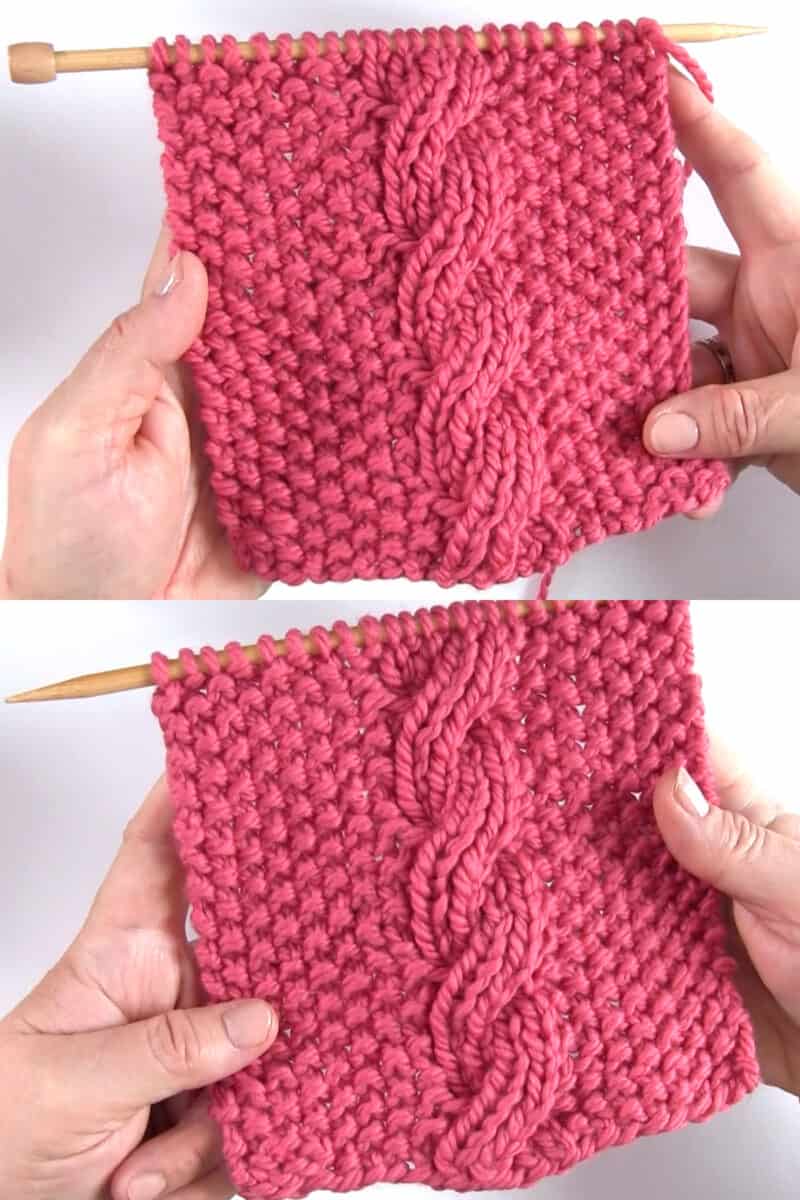
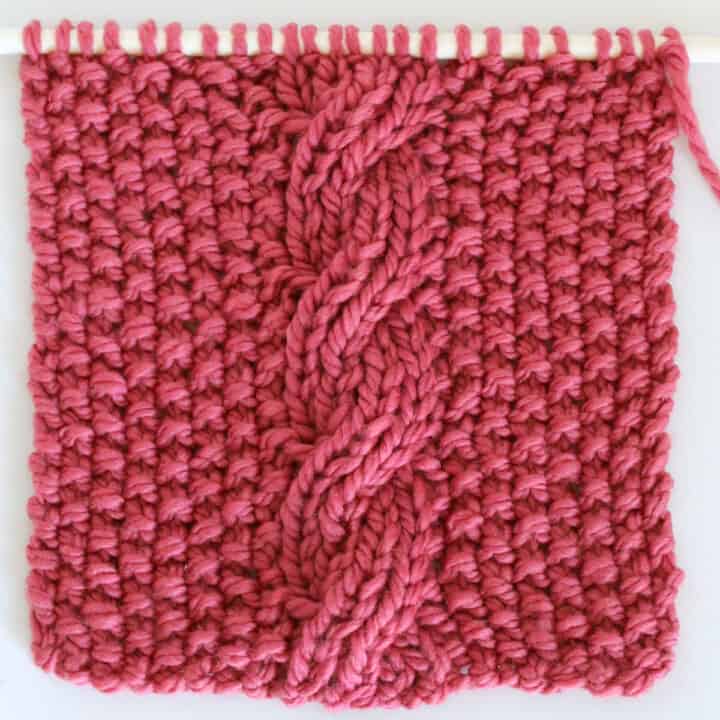
DOUBLE-SIDED: Reversible 4/4R Cable Stitch in 1×1 Rib on Seed Stitch Background
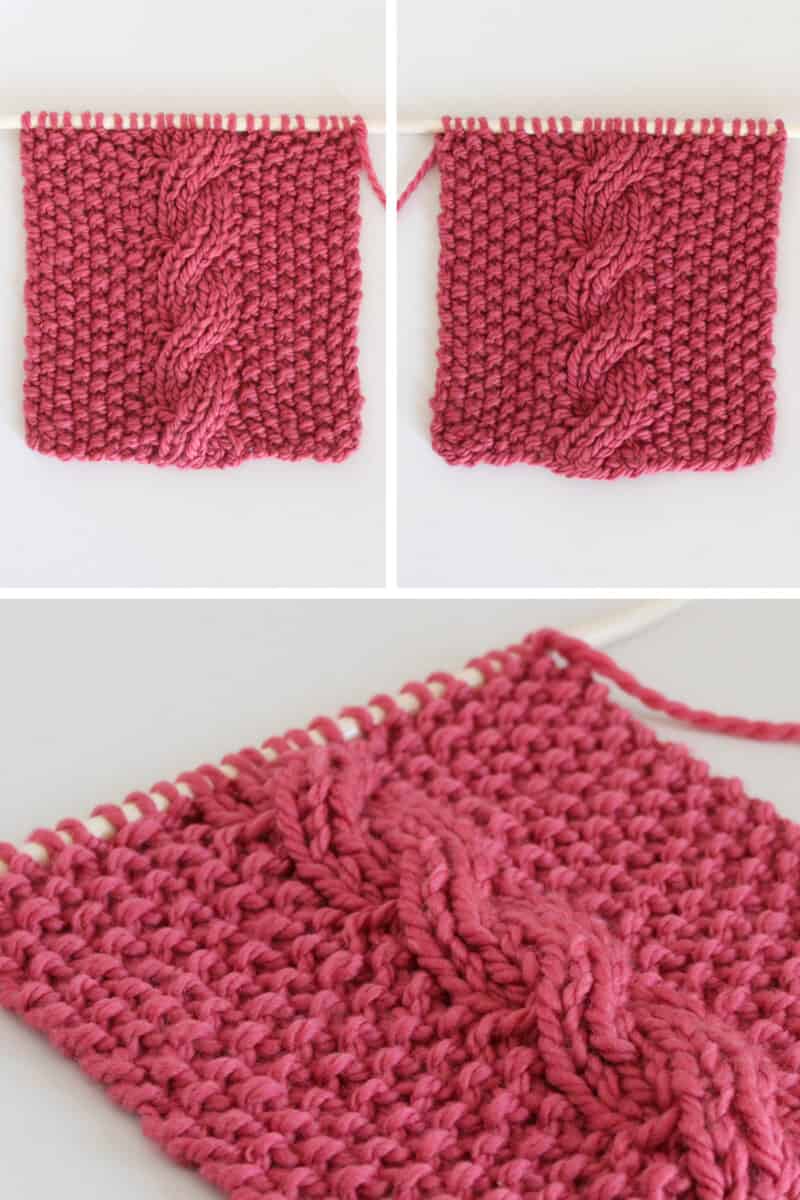
- Here’s another swatch knitted with the double-sided reversible cables for a 4/4R cable stitch.
- This reversible cable stitch is also created with 1×1 ribbing.
- Its background is the Seed Stitch texture.
- As a result, the cable pattern pops out of the background, making it a great choice.
Knitting Instructions:
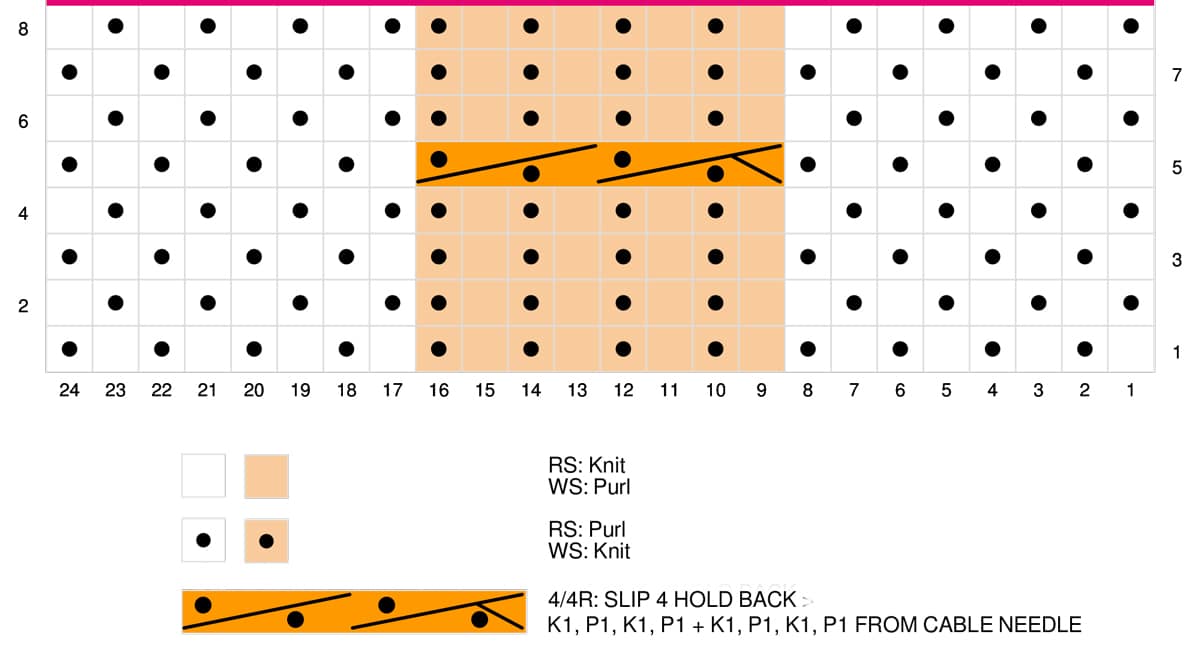
- Cast On: 24 Stitches
- Rows 1, 3, 7: * K1, P1 *
- Rows 2, 4, 6, and 8: P1, K1, P1, K1, P1, K1, P1, K2, P1, K1, P1, K1, P1, K1, P2, K1, P1, K1, P1, K1, P1, K1
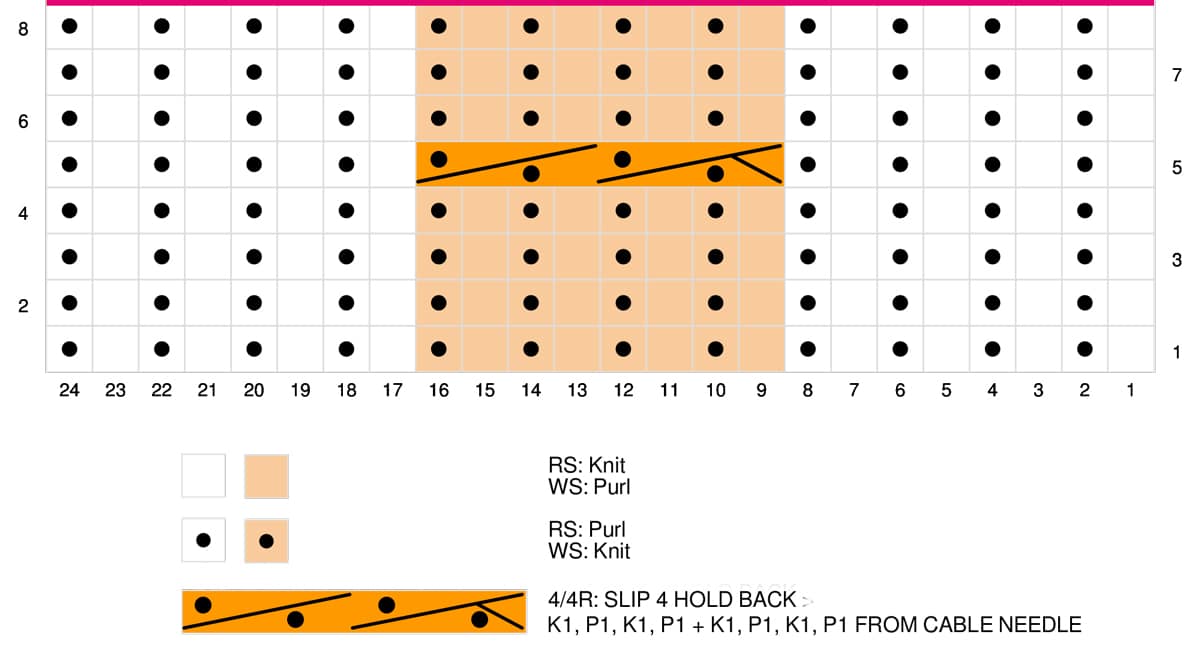
- Row 5: K1, P1, K1, P1, K1, P1, K1, P1, 4/4R, K1, P1, K1, P1, K1, P1, K1, P1
4/4R in 1×1 Rib Knitting Instructions: Slip four stitches on your cable needle and hold back. Knit four stitches of 1×1 ribbing (K1, P1, K1, P1) from your main needle, then four stitches of 1×1 ribbing (K1, P1, K1, P1) from your cable needle.
Repeat Rows 1 – 8 to the length desired.
Knitting Chart:
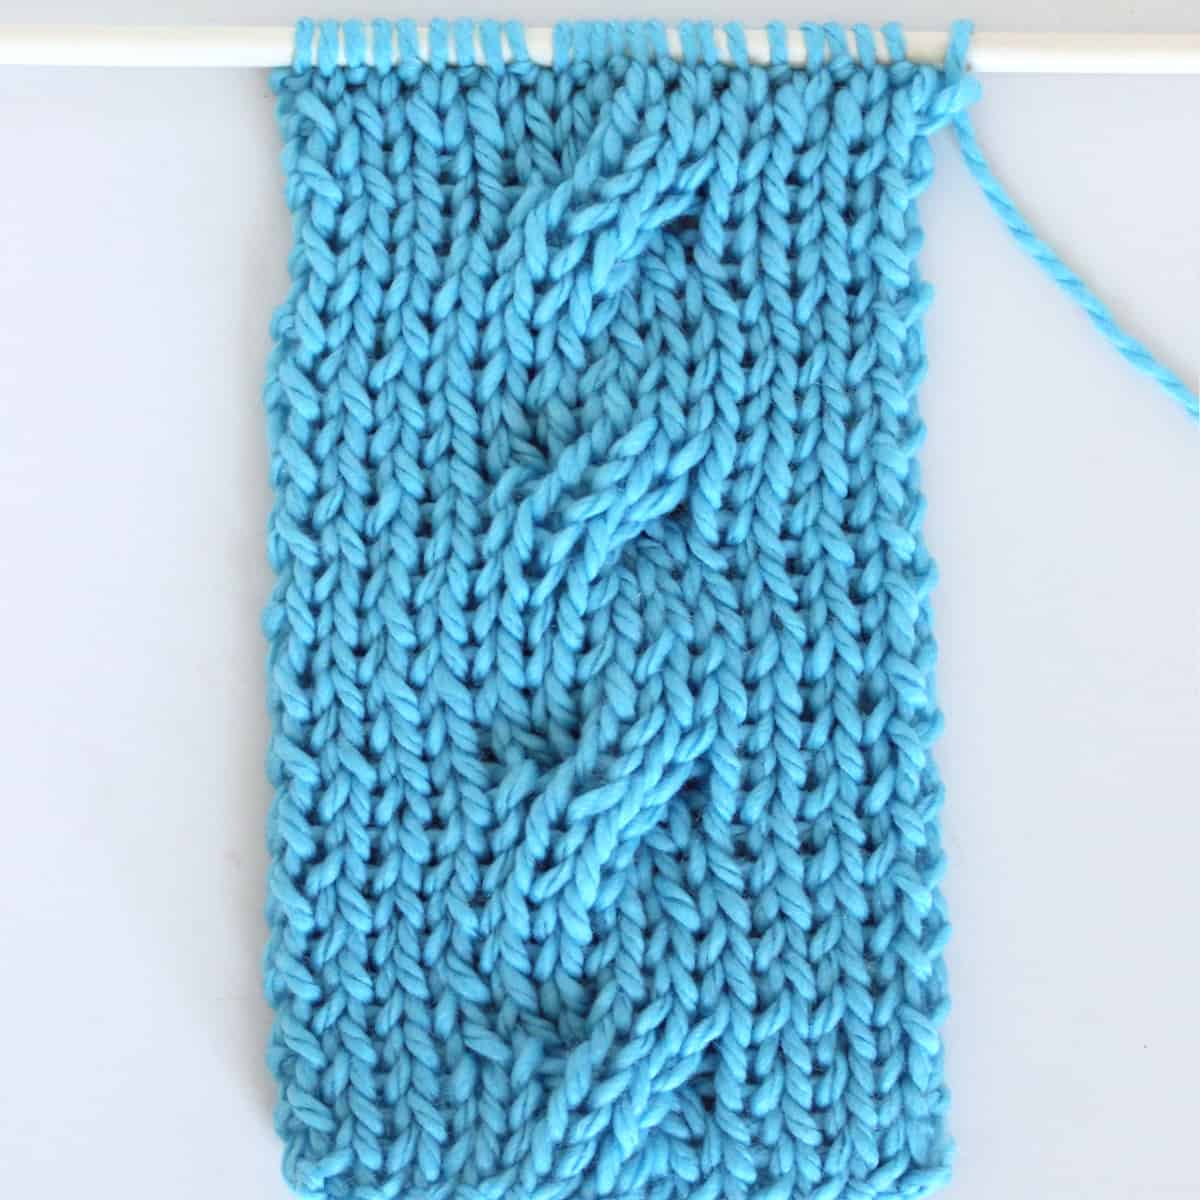
DOUBLE-SIDED: Reversible 4/4R Cable Stitch in 1×1 Rib on a 1×1 Rib Stitch Background
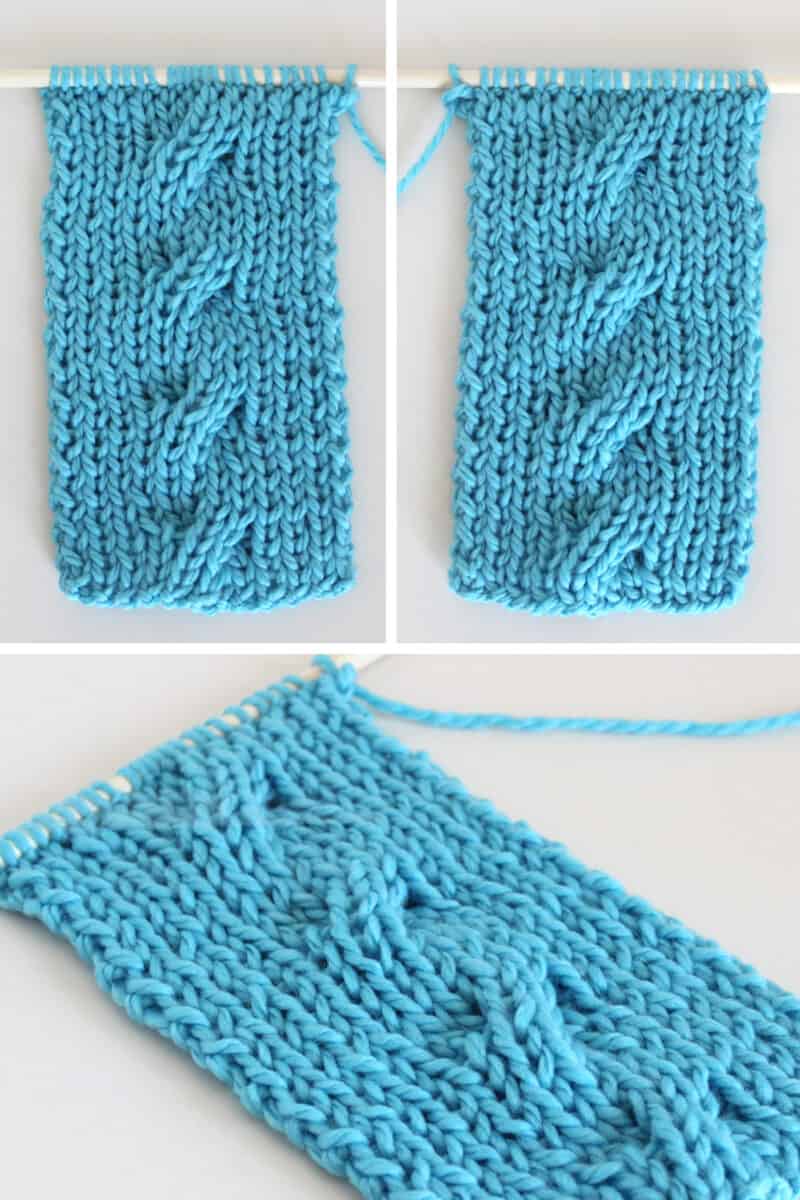
- Here is the last swatch example knitted with the two-sided reversible cables for a 4/4R cable stitch.
- This reversible cable stitch is created with 1×1 ribbing.
- Its background is also the 1×1 Rib Stitch.
- As a result, the cable texture is less distinct, blending somewhat into the over swatch design.
Knitting Instructions:
- Cast On: 24 Stitches
- Rows 1, 2, 3, 4, 6, 7, 8: * K1, P1 *
- Row 5: K1, P1, K1, P1, K1, P1, K1, P1, 4/4R, K1, P1, K1, P1, K1, P1, K1, P1
4/4R in 1×1 Rib Knitting Instructions: Slip four stitches on your cable needle and hold back. Knit four stitches of 1×1 ribbing (K1, P1, K1, P1) from your main needle, then four stitches of 1×1 ribbing (K1, P1, K1, P1) from your cable needle.
Repeat Rows 1 – 8 to the length desired.
Knitting Chart:
Printable Knitting Instructions
Printable Knitting Pattern
Learn how to knit Reversible Cable Ribbles with this easy technique. Ribbles are double-sided rib stitch cable textures. They look great in scarves and blankets, no matter which side is showing.
Materials
- Yarn - Any gauge
Tools
- Knitting Needles – Appropriately sized for your yarn
- Cable Needle
- Tapestry Needle
- Scissors
Instructions
Garter Stitch Background
Reversible 4/4R Cable Stitch in 1x1 Rib
- Cast On: 24 Stitches
- Rows 1, 2, 3, 4, 6, 7, 8: K8, K, P, K, P, K, P, K, P, K8
- Row 5: K8, 4/4R, K8
4/4R: Slip four stitches on your cable needle and hold back. Knit four stitches of 1x1 ribbing (K1, P1, K1, P1) from your main needle, then four stitches of 1x1 ribbing (K1, P1, K1, P1) from your cable needle.
_____
Seed Stitch Background
Reversible 4/4R Cable Stitch in 1x1 Rib
- Cast On: 24 Stitches
- Rows 1, 3, 7: * K1, P1 *
- Rows 2, 4, 6, and 8: P1, K1, P1, K1, P1, K1, P1, K2, P1, K1, P1, K1, P1, K1, P2, K1, P1, K1, P1, K1, P1, K1
- Row 5: K1, P1, K1, P1, K1, P1, K1, P1, 4/4R, K1, P1, K1, P1, K1, P1, K1, P1
4/4R: Slip four stitches on your cable needle and hold back. Knit four stitches of 1x1 ribbing (K1, P1, K1, P1) from your main needle, then four stitches of 1x1 ribbing (K1, P1, K1, P1) from your cable needle.
_____
1x1 Rib Stitch Background
Reversible 4/4R Cable Stitch in 1x1 Rib
- CO: 24 Stitches
- Rows 1, 2, 3, 4, 6, 7, 8: * K1, P1 *
- Row 5: K1, P1, K1, P1, K1, P1, K1, P1, 4/4R, K1, P1, K1, P1, K1, P1, K1, P1
4/4R: Slip four stitches on your cable needle and hold back. Knit four stitches of 1x1 ribbing (K1, P1, K1, P1) from your main needle, then four stitches of 1x1 ribbing (K1, P1, K1, P1) from your cable needle.
Notes
KNITTING TECHNIQUES
- CO = Cast On Long Tail
- K = Knit Stitch
- P = Purl Stitch
- 4/4R in 1x1 Rib Knitting Instructions: Slip four stitches on your cable needle and hold back. Knit four stitches of 1x1 ribbing (K1, P1, K1, P1) from your main needle, then four stitches of 1x1 ribbing (K1, P1, K1, P1) from your cable needle.
_____
REPEAT ROWS 1 - 8 to the length desired.

Kristen McDonnell
Author • Designer • Teacher
Kristen from StudioKnit LLC produces knitting video lessons and pattern designs from her vibrant production studio on Half Moon Bay’s California coast.
Kristen McDonnell is the author of the highly acclaimed book Knit Stitch: 50 Knit + Purl Patterns featuring vintage and unique designs.

