Point Reyes Knitted Blanket Pattern
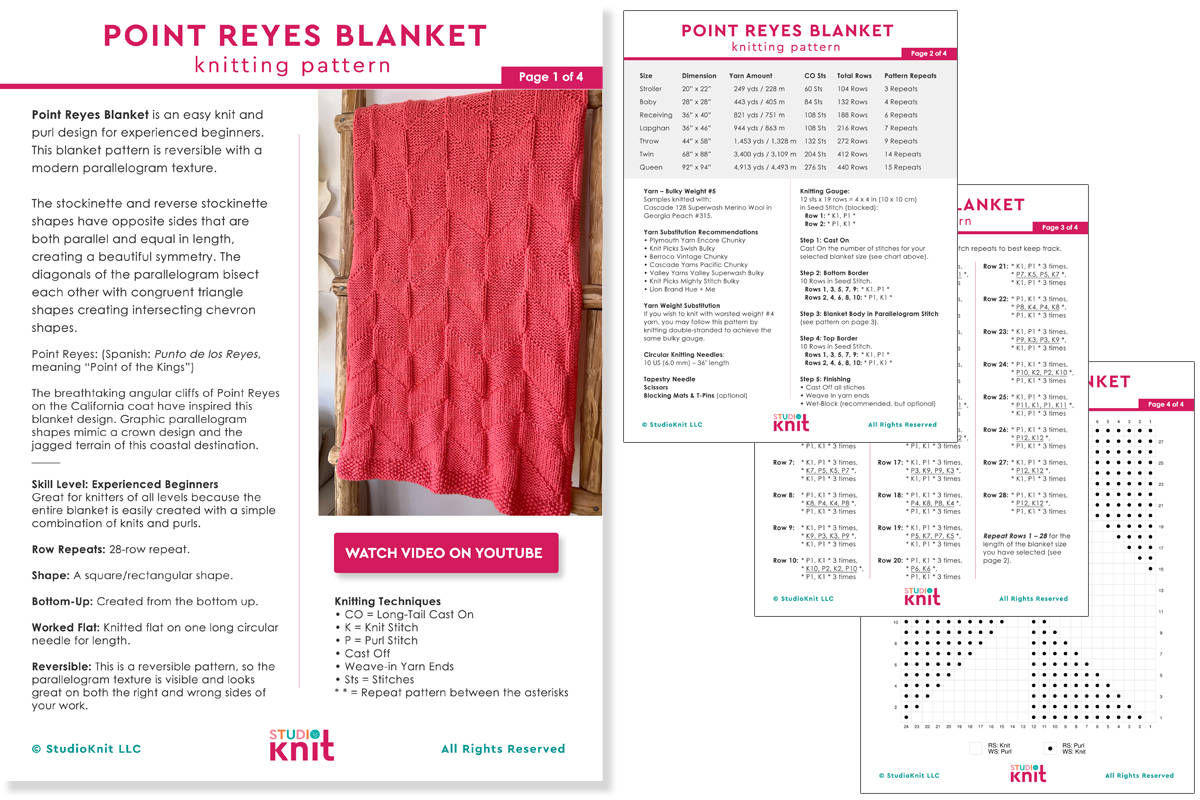
This Point Reyes Blanket Knitting Pattern is an easy knit and purl design for experienced beginners. This blanket pattern is reversible with a modern parallelogram texture. Select among seven blanket sizes and enjoy knitting up your new home decor today.
Get your free written and photo pattern instructions with a video tutorial.
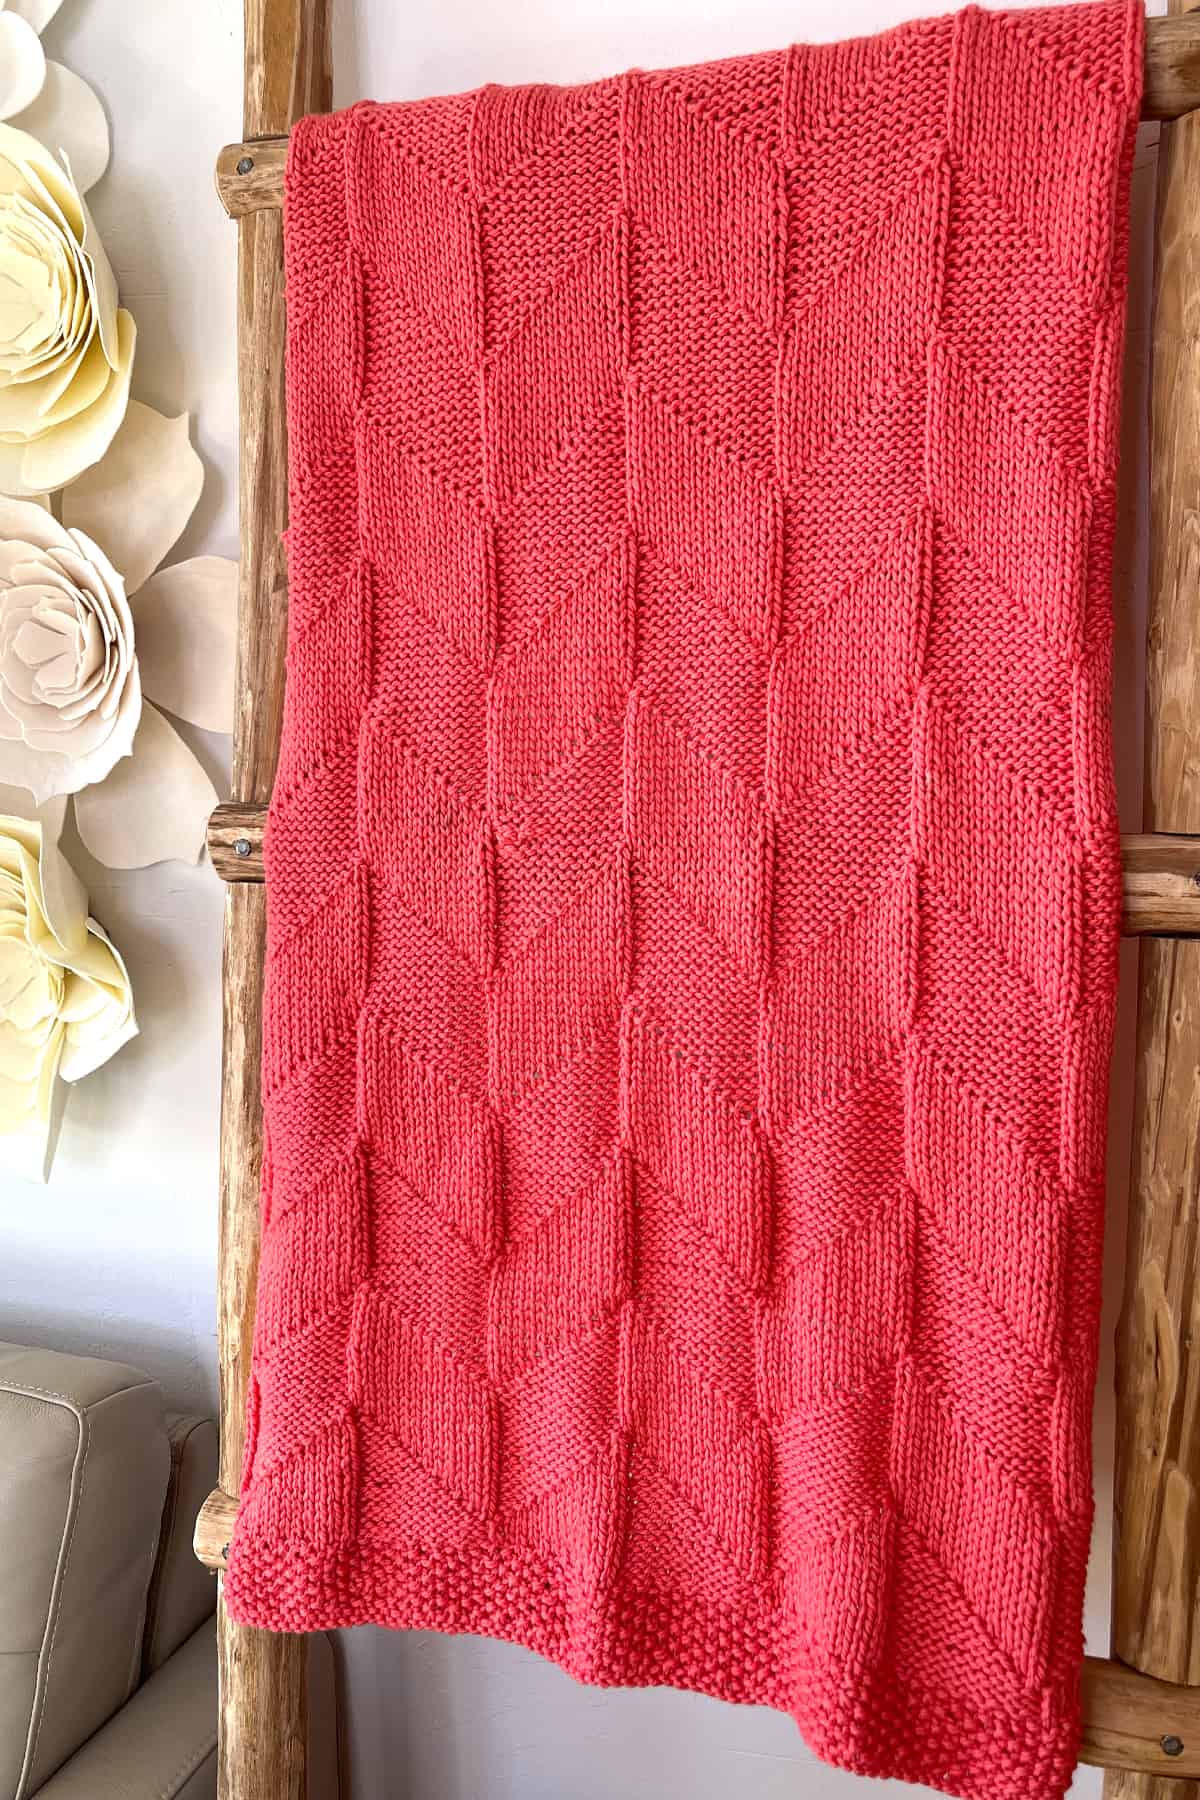
Table of Contents
Knitted Blanket Construction
My inspiration for this angular design is Point Reyes, a favorite prominent cape destination located up the California coastal highway from my knitting studio!
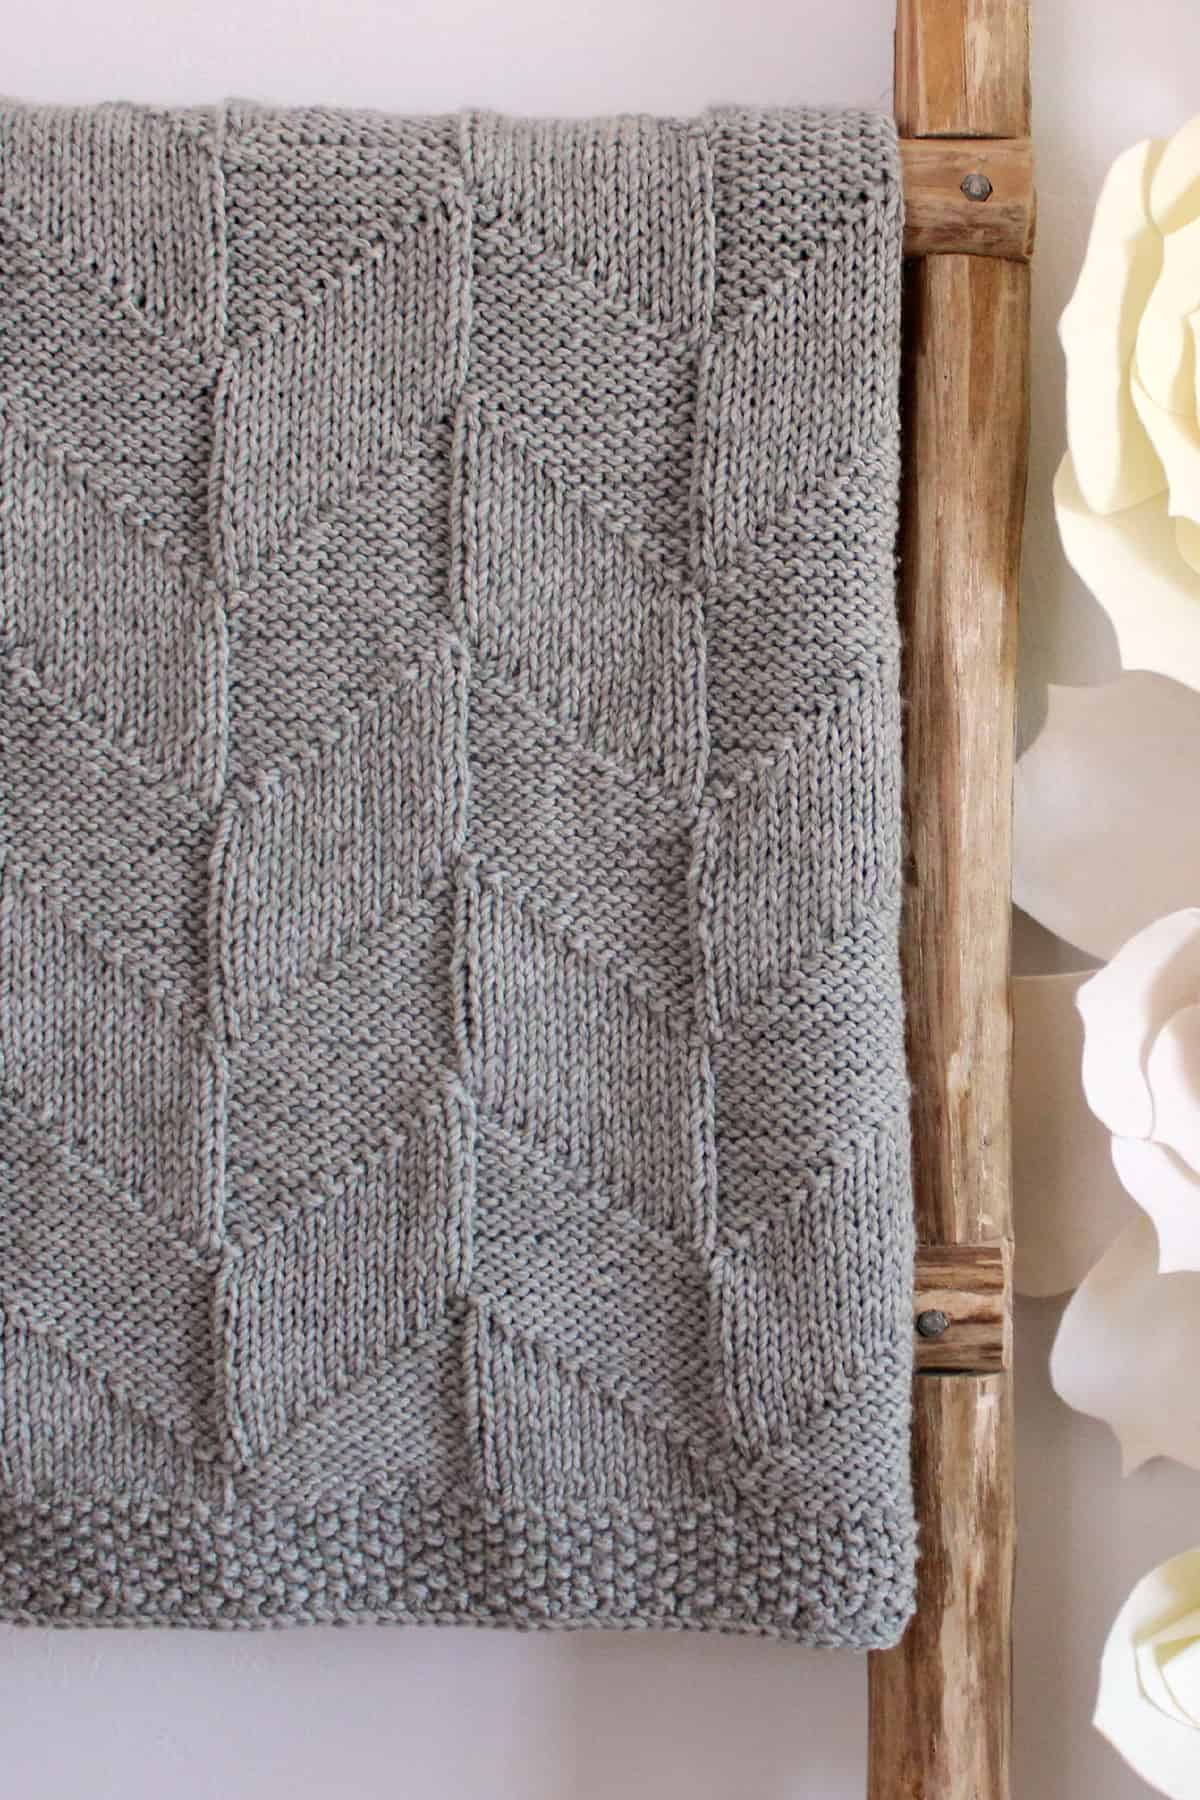
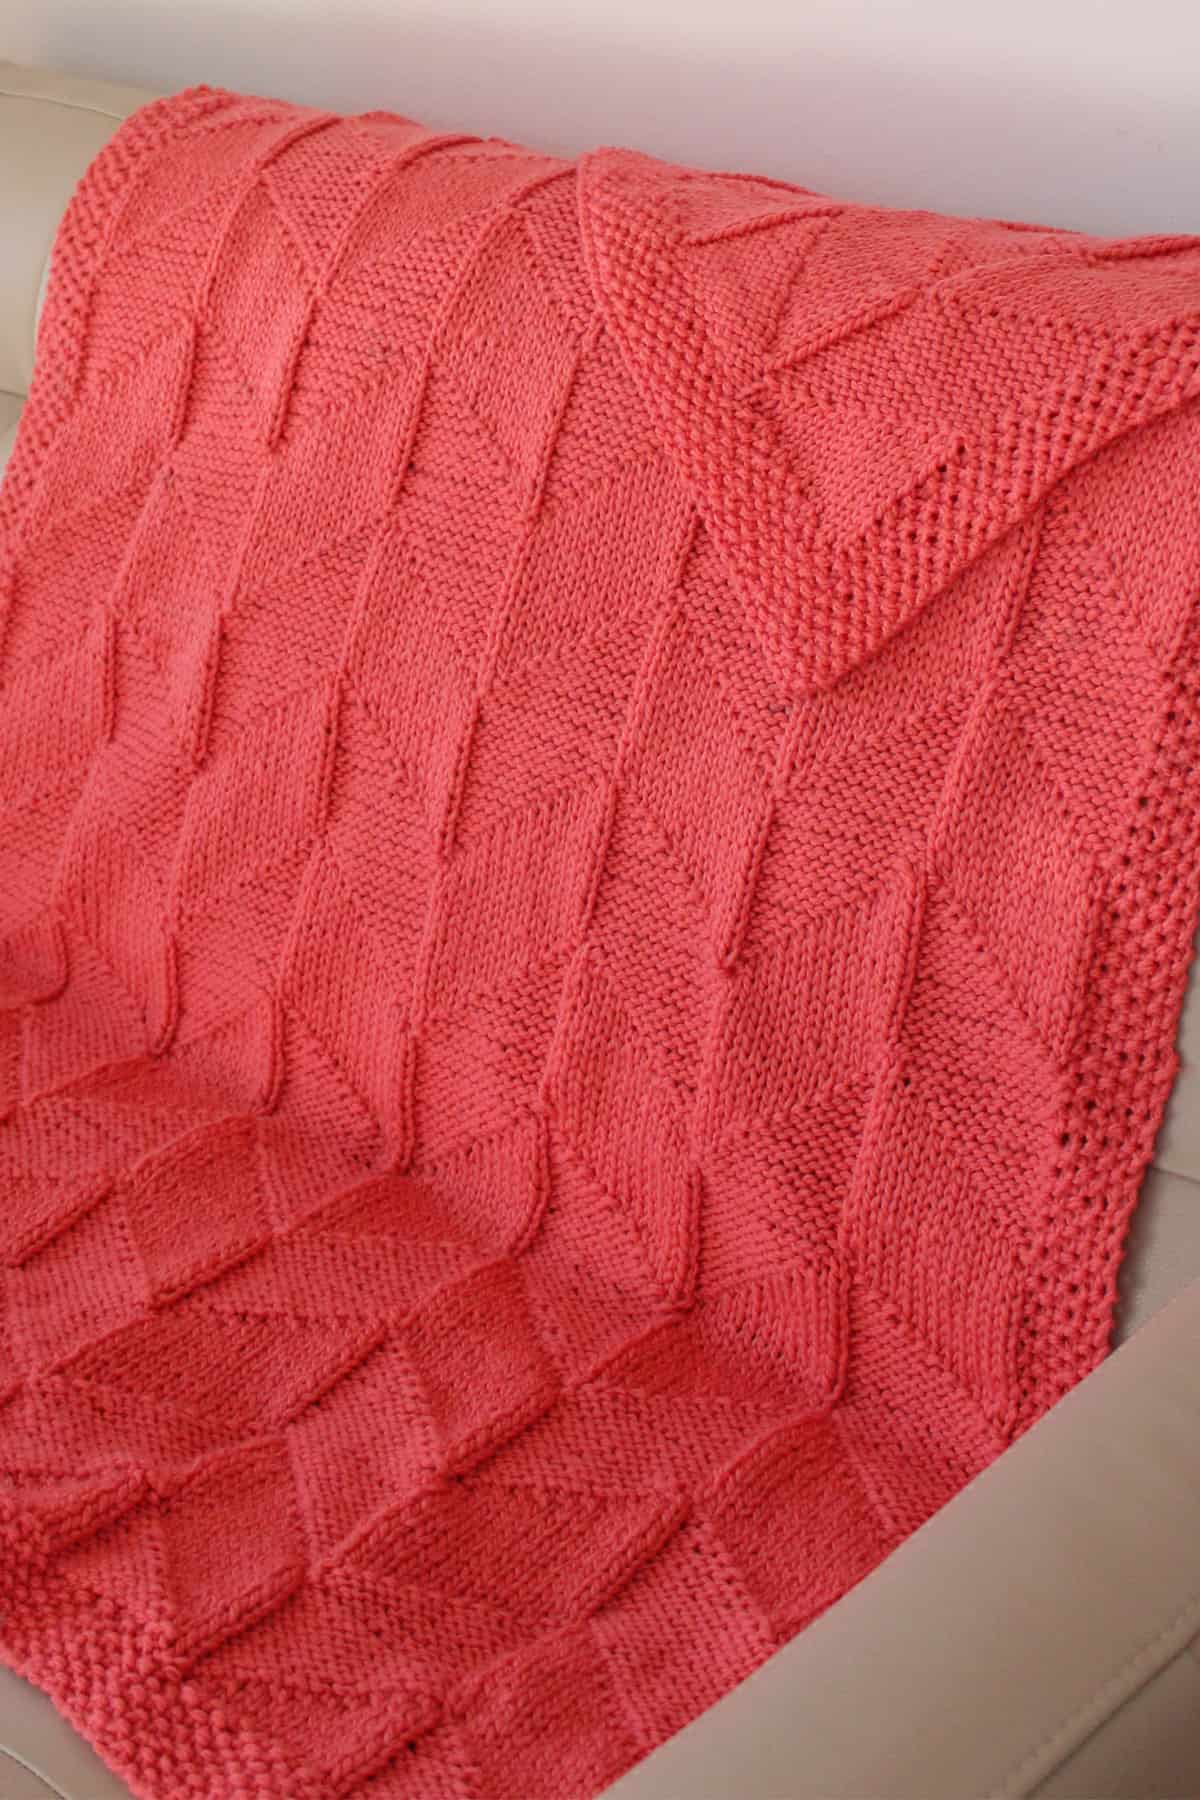
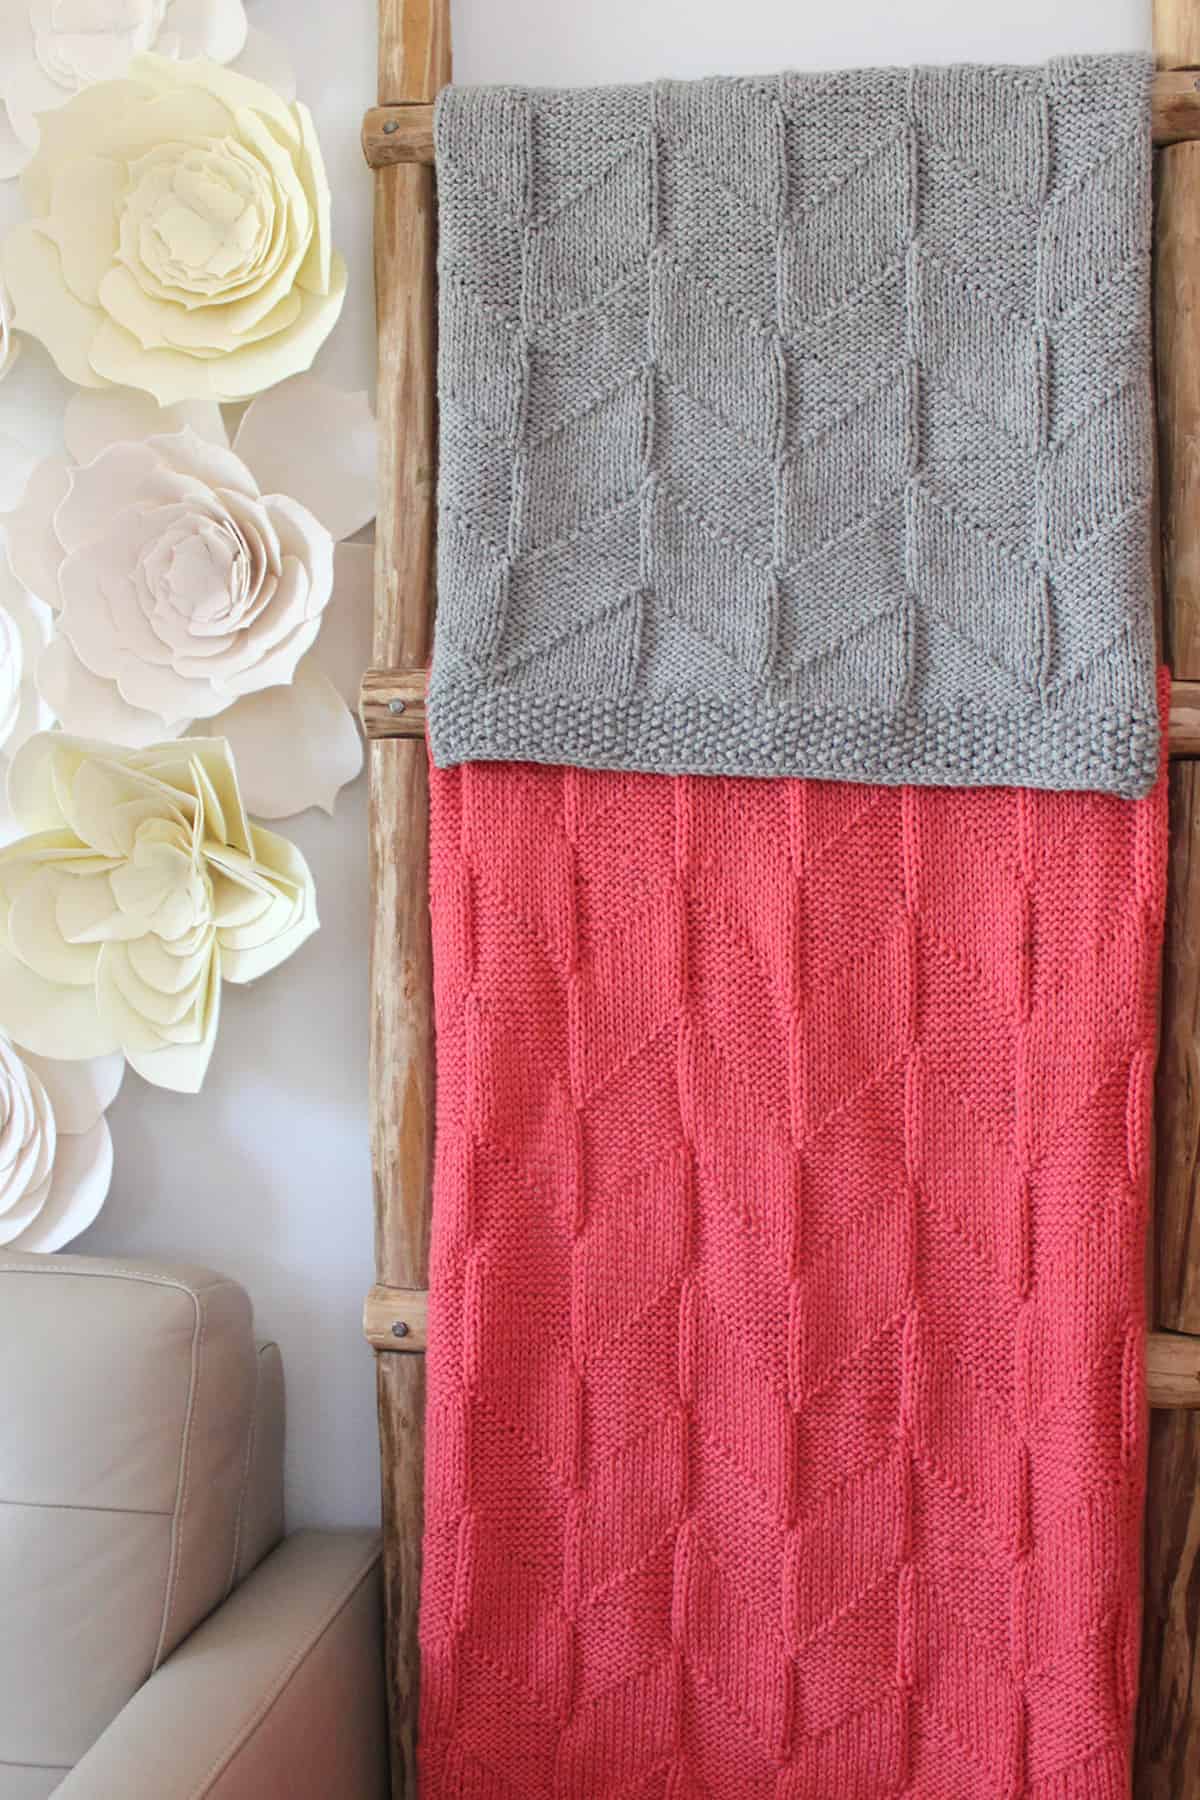
Blanket Texture Design: The Parallelogram knit stitch from my Knit Stitch Pattern Book has been modified into a bold and larger motif for this blanket pattern. The stockinette and reverse stockinette shapes have opposite sides both parallel and equal in length, creating a beautiful symmetry. As a result, the diagonals of the parallelogram bisect each other with congruent triangle shapes. Depending on your perspective, you can see intersecting chevron shapes emerge, as well!
Blanket Border: The Seed Stitch borders all four sides of the blanket pattern.
Beginner Level: The entire blanket is easily created with a simple combination of knits and purls.
Shape: A square/rectangular shape.
Bottom Up: This knitted blanket is created from the bottom up flat on a long circular needle.
Reversible: This is a reversible pattern, so the parallelogram texture is visible and looks great on both the right and wrong sides of your work.
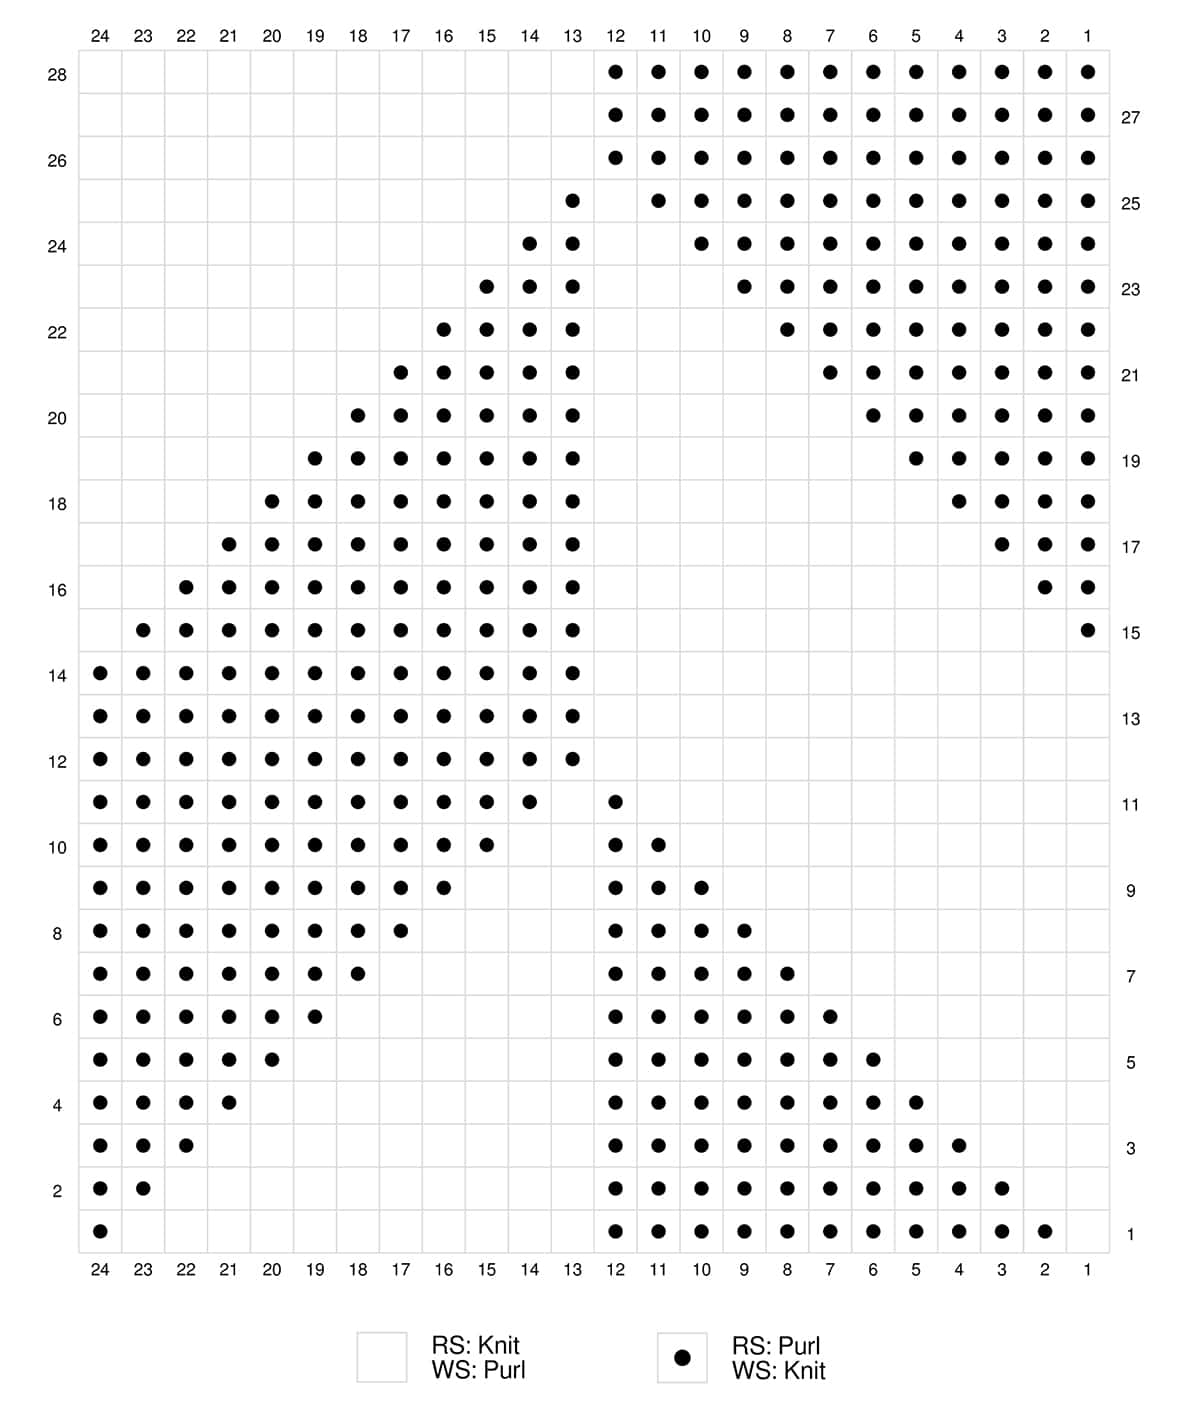
Row Repeats: The texture is created with 28-row repeat is a simple combination of knits and purls. Although the knitting techniques are simple, make sure to pay attention to the pattern row-by-row to create the correct texture.
Printable Knitting Pattern (ad-free)
WANT THE FREE PATTERN? Keep scrolling, it’s up next!
SINGLE PATTERN DOWNLOAD: Purchase the ad-free printable pdf pattern in my Studio Knit Pattern Shop. A great way to support my knitting work!
DISCOUNTED BLANKET BUNDLE: Save when you buy 4 Reversible Blanket Patterns together… buy 3, get 1 free! These knit and purl textures are identical on both sides, adding depth and beauty to create a durable heirlooms.
Watch Video Tutorial
Local Inspiration at Point Reyes
Point Reyes: (Spanish: Punto de los Reyes, meaning “Point of the Kings”)
The breathtaking angular cliffs of Point Reyes have inspired this blanket design. The graphic parallelogram shapes mimic a crown design and the jagged terrain of this coastal destination.
The remoted lagoons in the towns of Point Reyes have made it the perfect secret harbor. It is located about an hour’s drive north of my Studio Knit location along the Marin County coast. My family loves hiking along the trails overlooking the expanse of Ten Mile Beach while enjoying views of its picturesque lighthouse and soaring sea birds.
Blanket Sizes and Yarn Amount
Knitting Gauge in Seed Stitch Pattern
4″ x 4″ (10 x 10 cm) = 12 stitches x 19 rows
Row 1: * K1, P1 *
Row 2: * P1, K1 *
_____
Select a blanket size to determine the amount of yarn you’ll need, as well as help you know how many stitches to cast on your needle.
20” x 22” Baby Stroller Blanket
Cast On 60 Stitches
104 Rows, 3 Pattern Repeats
Yarn Amount 250 yds / 229 m (2 skeins of Cascade 128)
28” x 28” Baby Blanket
Cast On 84 Stitches
132 Rows, 4 Pattern Repeats
Yarn Amount 420 yds / 384 m (4 skeins of Cascade 128)
36” x 40” Receiving Blanket
Cast On 108 Stitches
188 Rows, 6 Pattern Repeats
Yarn Amount 770 yds / 704 m (6 skeins of Cascade 128)
36” x 46” Lapghan Blanket – My pictured sample size
Cast On 108 Stitches
216 Rows, 7 Pattern Repeats
Yarn Amount 880 yds / 805 m (7 skeins of Cascade 128)
44” x 58” Blanket Throw
Cast On 132 Stitches
272 Rows, 9 Pattern Repeats
Yarn Amount 1,370 yds / 1,253 m (11 skeins of Cascade 128)
68” x 88” Twin Bedspread
Cast On 204 Stitches
412 Rows, 14 Pattern Repeats
Yarn Amount 3,200 yds / 2,926 m (25 skeins of Cascade 128)
92” x 94” Queen Bedspread
Cast On 276 Stitches
Knit 440 Rows, 15 Pattern Repeats
Yarn Amount 4,600 yds / 4,200 m (36 skeins of Cascade 128)
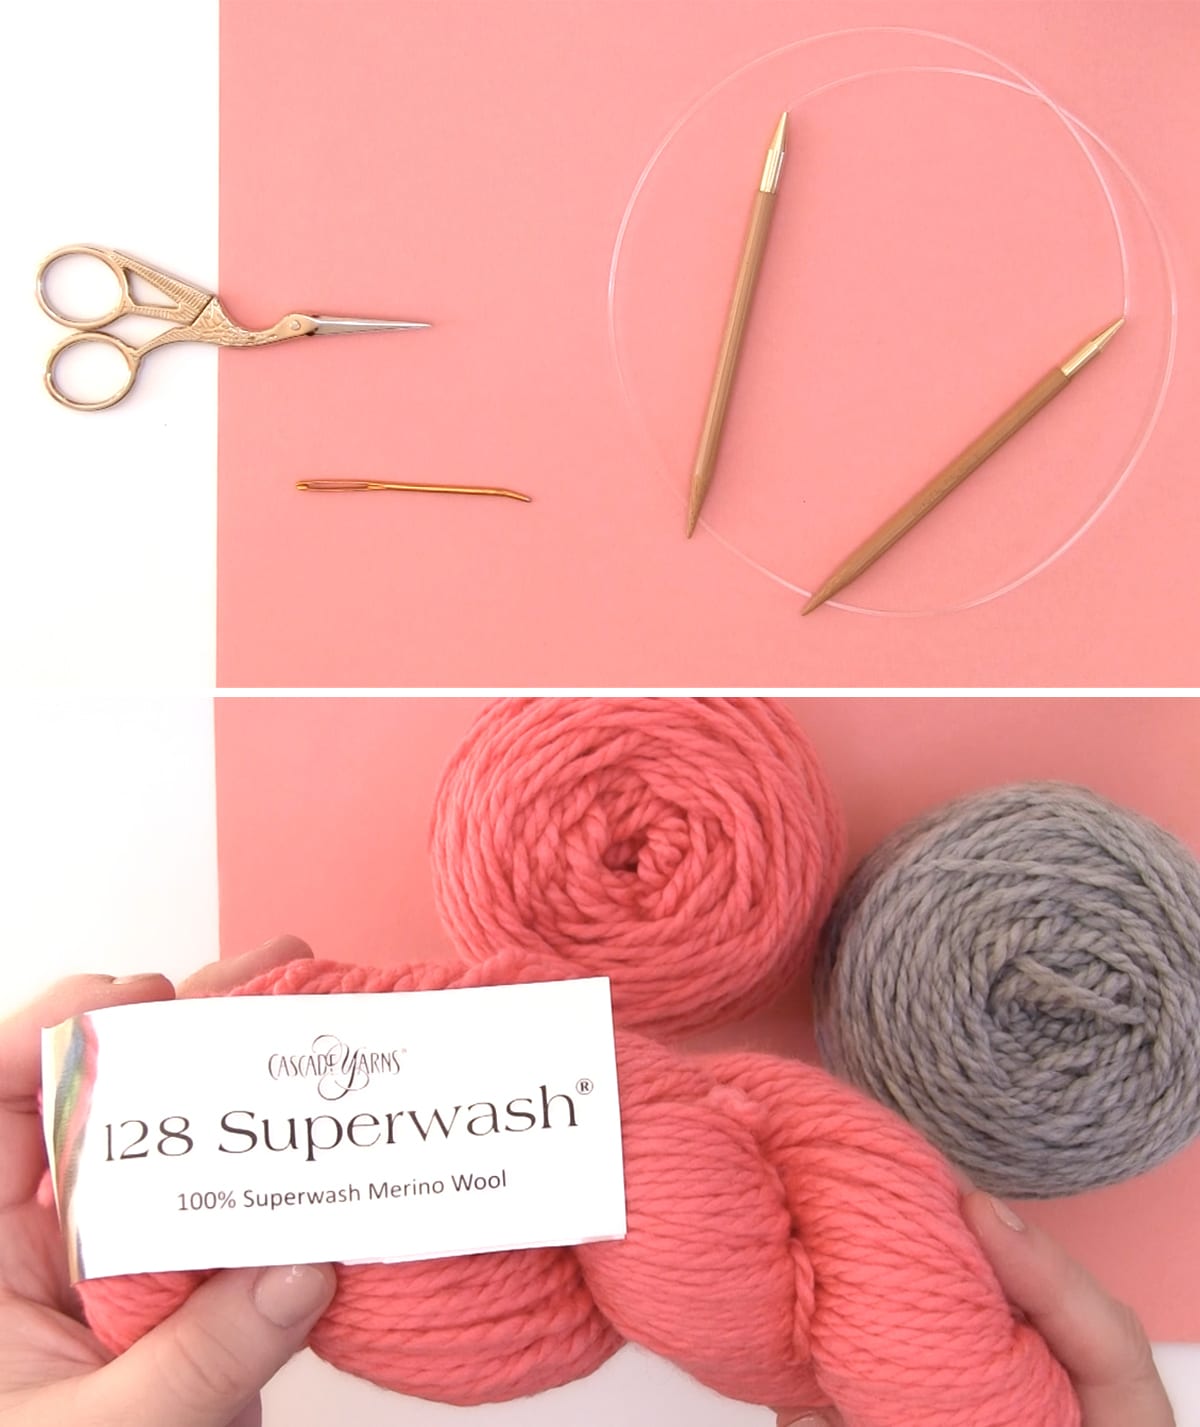
Knitting Supplies
As an Amazon Associate, I earn from qualifying purchases.
Knitting Needles
- Size 10 US (6 mm) – Circular 36″ or longer in length for blanket size
Knitting Tools
- Tapestry Needle
- Scissors
Optional: - Knitting Blocks and T-Pins
- Digital Row Counter – Using row counters tutorial >
- Needle Point Protectors – How to prevent stitches from falling off your needles >
Yarn – Bulky Weight #5
Feel free to use any fiber and colors of your choice.
When choosing yarn, I wanted the warmth and quality of a natural wool fiber that can be easily washed. As a result, my blanket samples pictured were knit in Cascade 128 Superwash Merino Wool.
The samples shown were knit with Silver #1946 and Georgia Peach #315.
Yarn Substitution Recommendations
- Ewe Ewe Yarn Baa Baa Bulky (affiliate link)
- Plymouth Yarn Encore Chunky
- Berroco Vintage Chunky
- Knit Picks Swish Bulky
- Cascade Yarns Pacific Chunky
- Lion Brand Hue + Me
Yarn Weight Substitution
If you would rather knit with worsted weight #4 yarn, you may follow this pattern by knitting double-stranded to achieve the same bulky gauge.
Knitting Techniques
Need to brush up or learn a new technique? Check out my entire library of Knitting Techniques to help you along as you knit up this blanket pattern.
- How to Cast On Without a Slip Knot or Slip Knot
- Cast On
- K = Knit Stitch
- P = Purl Stitch
- Cast Off
- Weave-in Yarn Ends
- * * = Repeat Pattern between the asterisks
Blanket Knitting Instructions
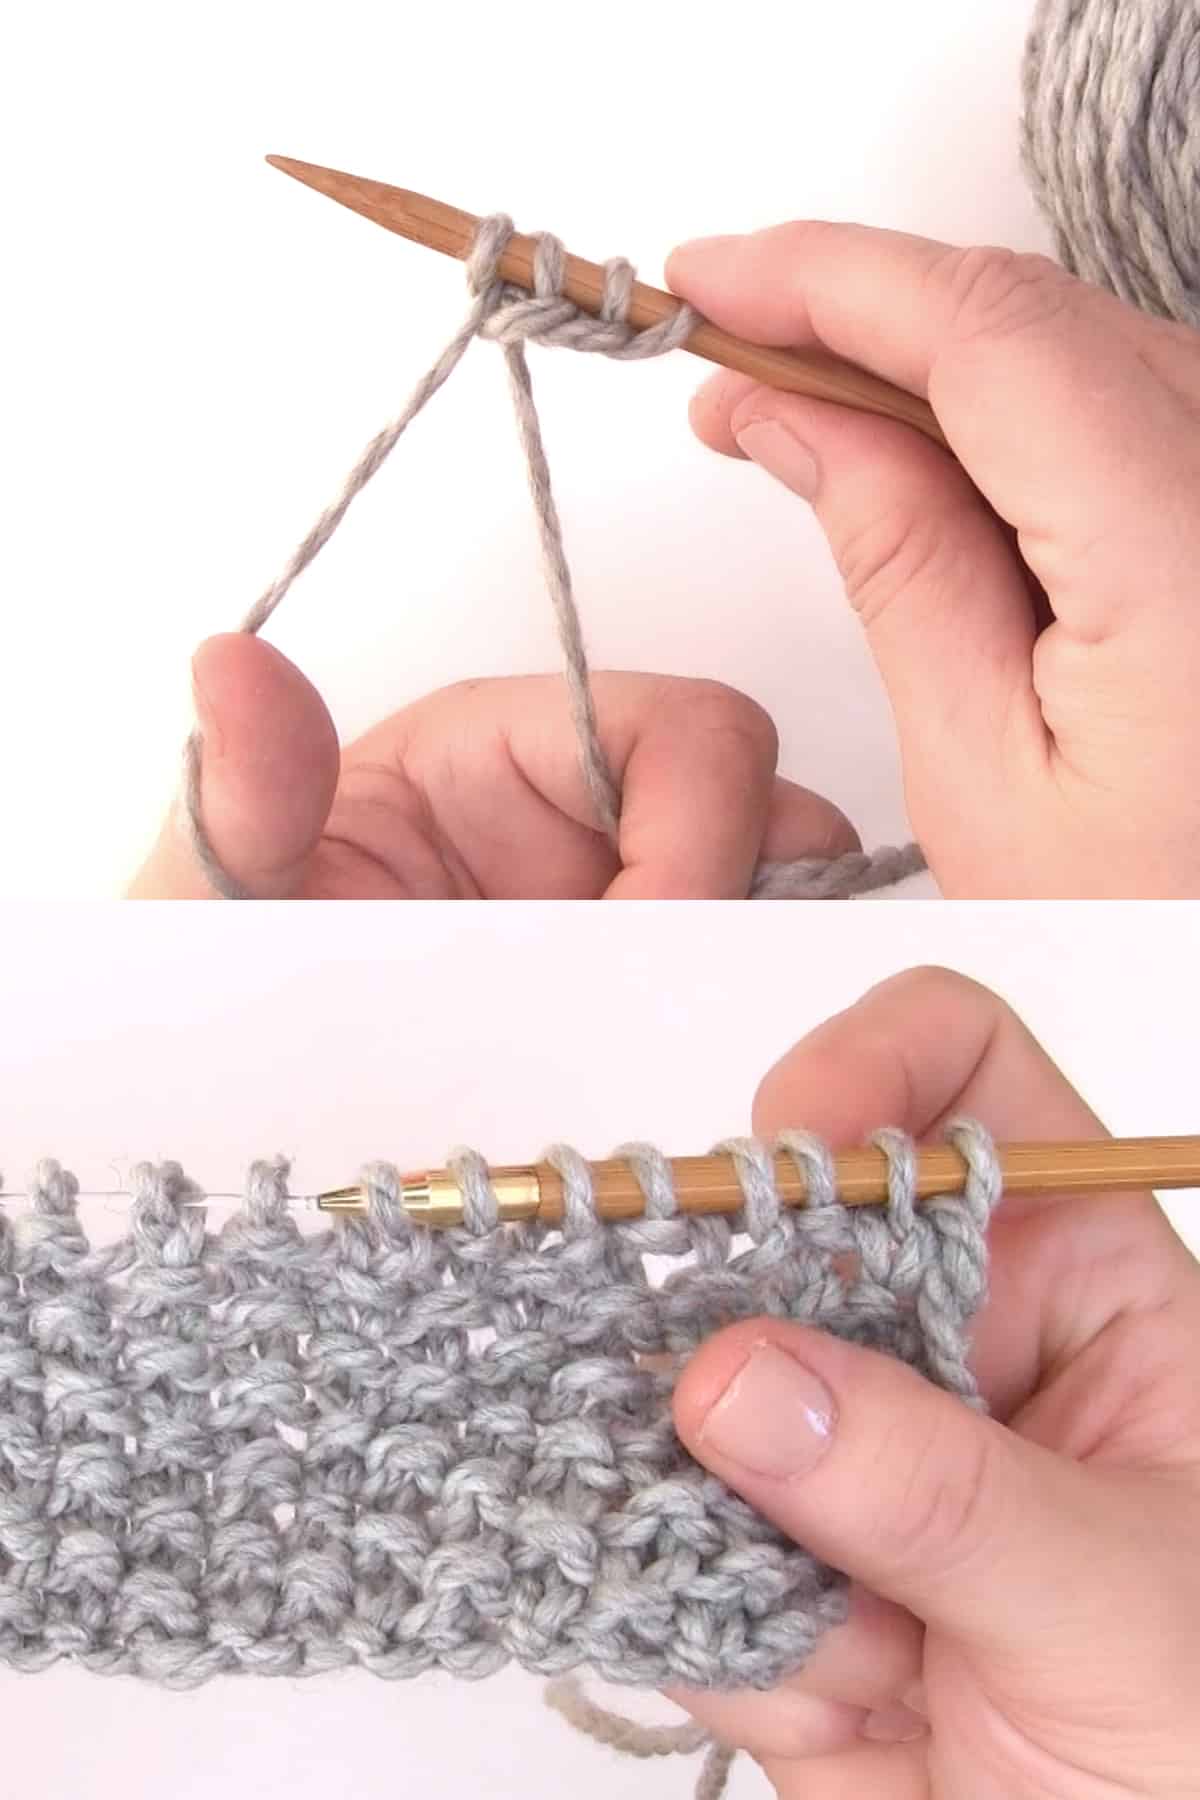
Step 1: Cast On
Cast On the number of stitches for the blanket size you’ve selected (see sizes above).
___
Step 2: Bottom Border
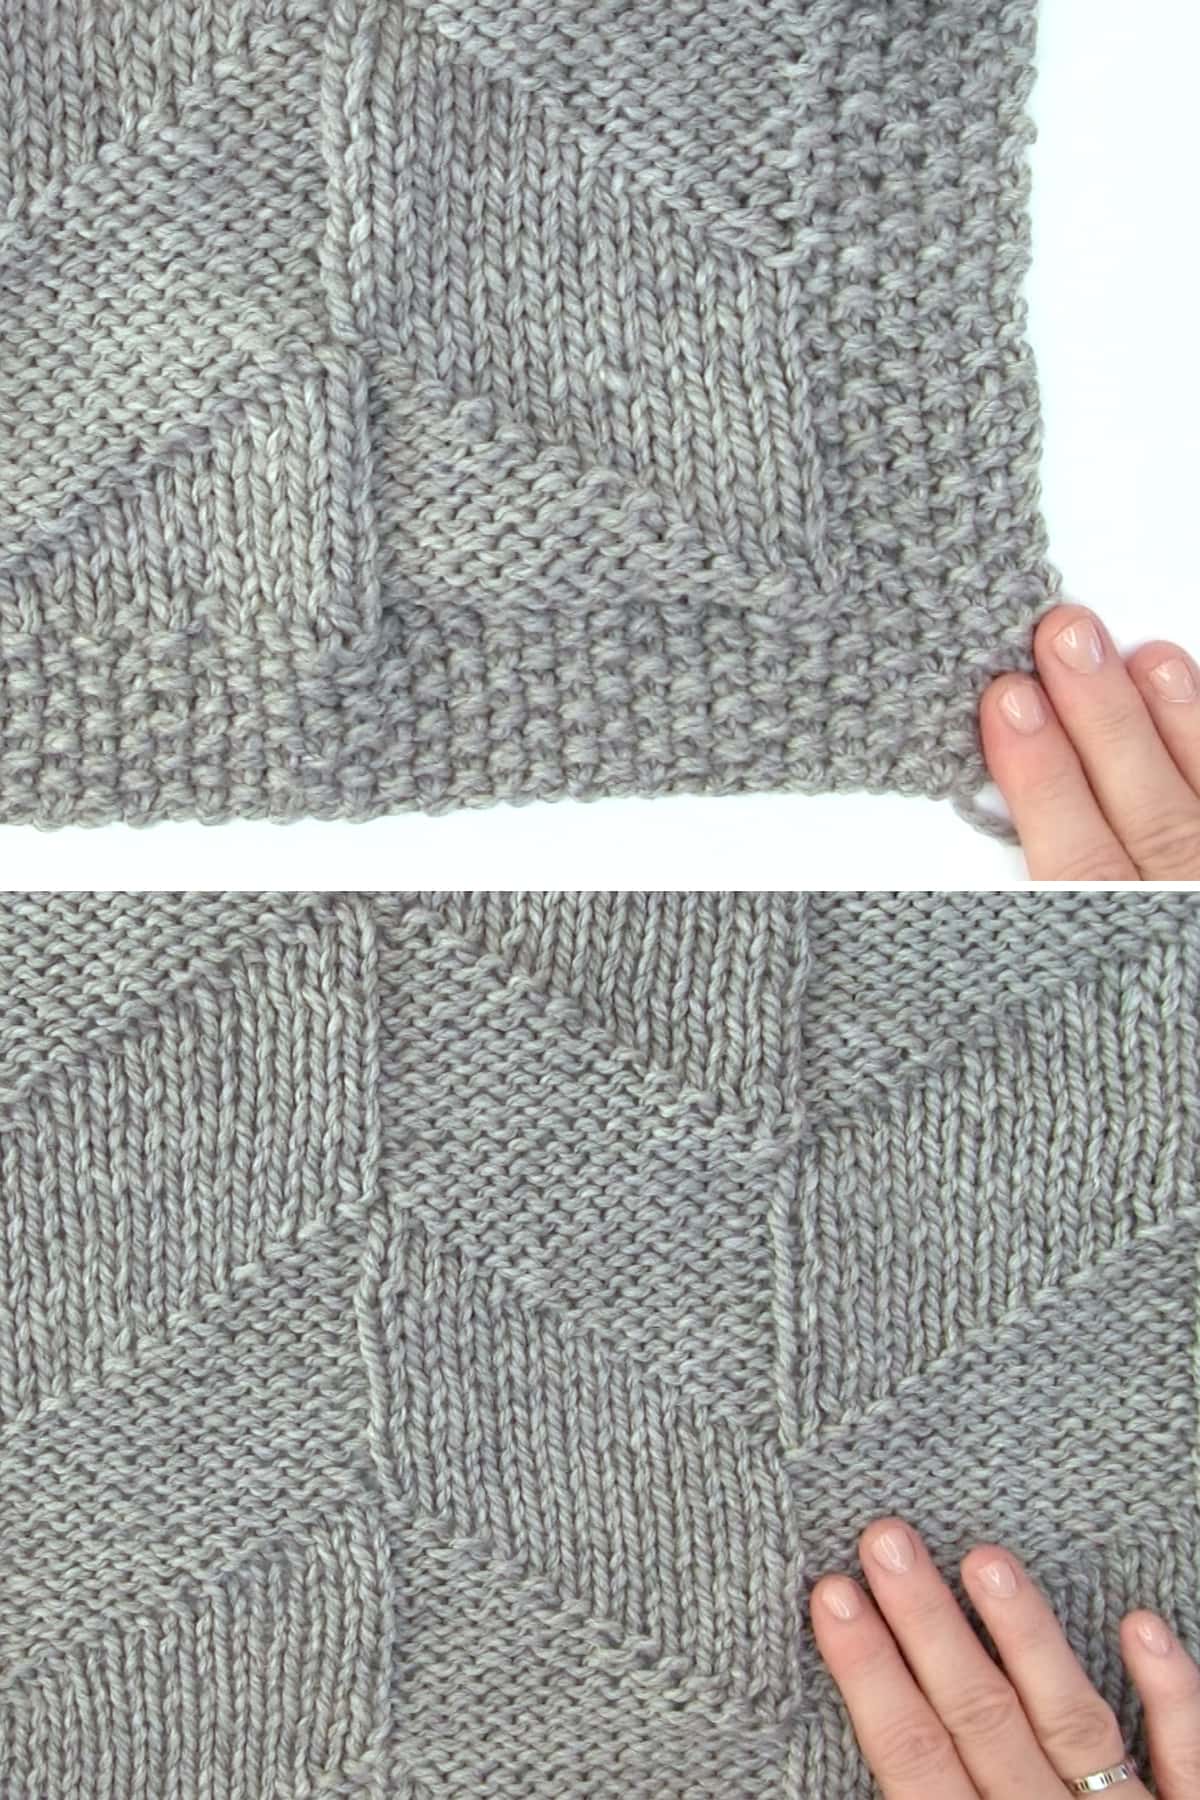
Begin knitting the bottom border with 10 Rows in Seed Stitch.
When knitting flat on a long circular needle for your project’s length, begin by holding the “empty” needle in your dominant hand (right for right-handers, left for left-handers) while knitting from the needle with the yarn tail in your non-dominant hand.
Rows 1, 3, 5, 7, 9: * K1, P1 *
Rows 2, 4, 6, 8, 10: * P1, K1 *
___
Step 3: Blanket Body
Knit the Parallelogram Stitch.
This pattern includes 6 stitches of seed stitch on each side.
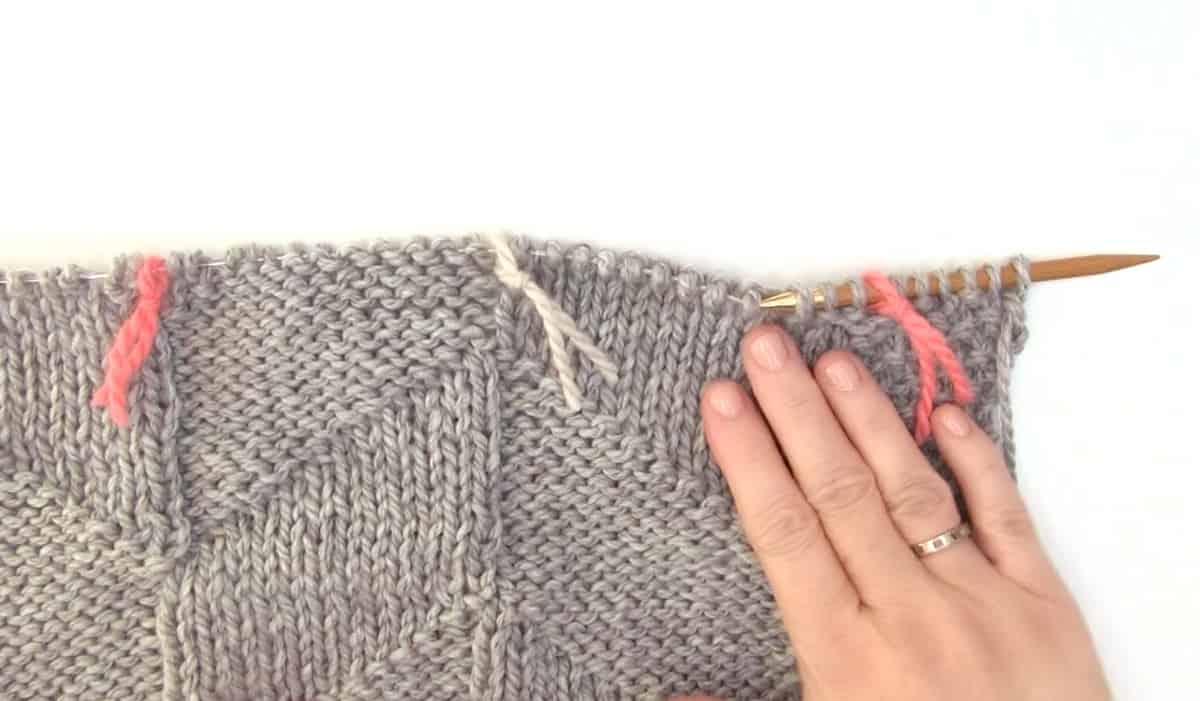
To best keep track of your stitches, it is recommended to place markers. I simply use a little scrap yarn and place them between the stitch repeats. Doing so allows me to easily keep track of my stitches while knitting row-by-row.
- Row 1 (Right Side): (* K1, P1 * 3 times), * K1, P11, K11, P1 *, (* K1, P1 * 3 times)
- Row 2 (Wrong Side): (* P1, K1 * 3 times), * K2, P10, K10, P2 *, (* P1, K1 * 3 times)
- Row 3: (* K1, P1 * 3 times), * K3, P9, K9, P3 * (* K1, P1 * 3 times)
- Row 4: (* P1, K1 * 3 times), * K4, P8, K8, P4 *, (* P1, K1 * 3 times)
- Row 5: (* K1, P1 * 3 times), * K5, P7, K7, P5 *, (* K1, P1 * 3 times)
- Row 6: (* P1, K1 * 3 times), * K6, P6 *, (* P1, K1 * 3 times)
- Row 7: (* K1, P1 * 3 times), * K7, P5, K5, P7 *, (* K1, P1 * 3 times)
- Row 8: (* P1, K1 * 3 times), * K8, P4, K4, P8 *, (* P1, K1 * 3 times)
- Row 9: (* K1, P1 * 3 times), * K9, P3, K3, P9 *, (* K1, P1 * 3 times)
- Row 10: (* P1, K1 * 3 times), * K10, P2, K2, P10 *, (* P1, K1 * 3 times)
- Row 11: (* K1, P1 * 3 times), * K11, P1, K1, P11 *, (* K1, P1 * 3 times)
- Row 12: (* P1, K1 * 3 times), * K12, P12 *, (* P1, K1 * 3 times)
- Row 13: (* K1, P1 * 3 times), * K12, P12 *, (* K1, P1 * 3 times)
- Row 14: (* P1, K1 * 3 times), * K12, P12 *, (* P1, K1 * 3 times)
- Row 15: (* K1, P1 * 3 times), * P1, K11, P11, K1 *, (* K1, P1 * 3 times)
- Row 16: (* P1, K1 * 3 times), * P2, K10, P10, K2 *, (* P1, K1 * 3 times)
- Row 17: (* K1, P1 * 3 times) * P3, K9, P9, K3 *, (* K1, P1 * 3 times)
- Row 18: (* P1, K1 * 3 times), * P4, K8, P8, K4 *, (* P1, K1 * 3 times)
- Row 19: (* K1, P1 * 3 times), * P5, K7, P7, K5 *, (* K1, P1 * 3 times)
- Row 20: (* P1, K1 * 3 times), * P6, K6 *, (* P1, K1 * 3 times)
- Row 21: (* K1, P1 * 3 times) * P7, K5, P5, K7 *, (* K1, P1 * 3 times)
- Row 22: (* P1, K1 * 3 times), * P8, K4, P4, K8 *, (* P1, K1 * 3 times)
- Row 23: (* K1, P1 * 3 times), * P9, K3, P3, K9 *, (* K1, P1 * 3 times)
- Row 24: (* P1, K1 * 3 times), * P10, K2, P2, K10 *, (* P1, K1 * 3 times)
- Row 25: (* K1, P1 * 3 times), * P11, K1, P1, K11 *, (* K1, P1 * 3 times)
- Row 26: (* P1, K1 * 3 times) * P12, K12 *, (* P1, K1 * 3 times)
- Row 27: (* K1, P1 * 3 times) * P12, K12 *, (* K1, P1 * 3 times)
- Row 28: (* P1, K1 * 3 times), * P12, K12 *, (* P1, K1 * 3 times)
Repeat Rows 1 – 28 of the Parallelogram Stitch until your blanket is the length you desire. See the number of pattern repeats required in the above Blanket Sizes section.
___
Step 4: Top Border
Complete your blanket by knitting the top border with 10 Rows in Seed Stitch.
Rows 1, 3, 5, 7, 9: * K1, P1 *
Rows 2, 4, 6, 8, 10: * P1, K1 *
___
Step 5: Cast Off and Finish
- Cast Off all stitches;
- Weave in your yarn ends;
- Wet-Blocking Recommended: You may wish to block your work for the best results.
Printable Knitting Instructions
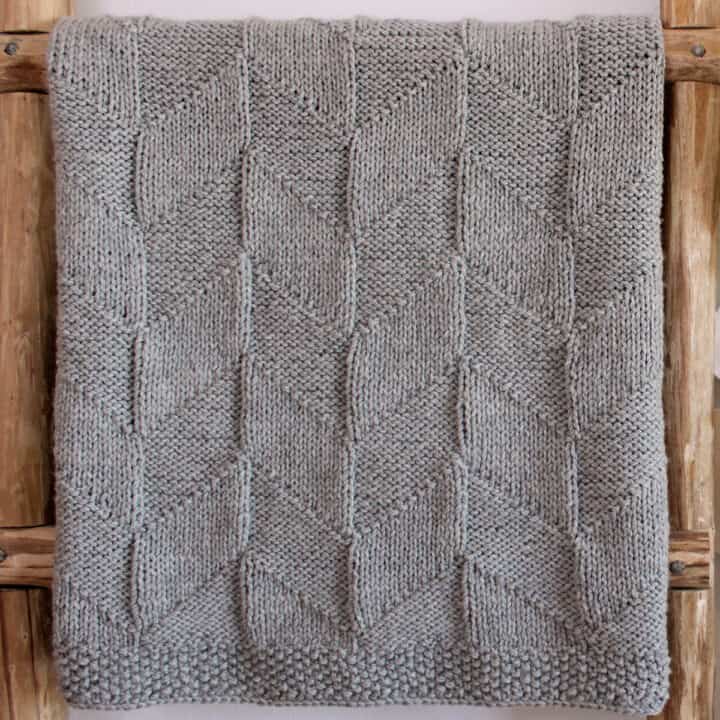
Printable Knitting Pattern for Lapghan Blanket
My Point Reyes Blanket in Parallelogram Stitch is an easy knit and purl design great for beginners. This blanket pattern is reversible with a modern, graphic texture.
Materials
- Yarn - Bulky Weight #5 in any fiber or color of your choice.
- Amount 880 yds / 805 m
- My sample was knit in Cascade 128 Superwash Merino Wool in color Georgia Peach #315.
- Lapghan Size (36" x 46") required 7 skeins of this yarn brand.
Tools
- Circular Knitting Needle 10 US / 6.0 mm, 36” length
- Tapestry Needle
- Scissors
Instructions
This printable pattern is specifically for the Lapghan Throw Size (36" x 46") Blanket. For other blanket sizes, please see the yarn amount and pattern specifics in the above post.
_____
Step 1: Cast On
Cast 108 stitches onto your needle with the long-tail method.
_____
Step 2: Bottom Border in Seed Stitch
Rows 1, 3, 5, 7, 9: * K1, P1 *
Rows 2, 4, 6, 8, 10: * P1, K1 *
_____
Step 3: Blanket Body in Parallelogram Stitch
- Row 1 (Right Side): (* K1, P1 * 3 times), * K1, P11, K11, P1 *, (* K1, P1 * 3 times)
- Row 2 (Wrong Side): (* P1, K1 * 3 times), * K2, P10, K10, P2 *, (* P1, K1 * 3 times)
- Row 3: (* K1, P1 * 3 times), * K3, P9, K9, P3 * (* K1, P1 * 3 times)
- Row 4: (* P1, K1 * 3 times), * K4, P8, K8, P4 *, (* P1, K1 * 3 times)
- Row 5: (* K1, P1 * 3 times), * K5, P7, K7, P5 *, (* K1, P1 * 3 times)
- Row 6: (* P1, K1 * 3 times), * K6, P6 *, (* P1, K1 * 3 times)
- Row 7: (* K1, P1 * 3 times), * K7, P5, K5, P7 *, (* K1, P1 * 3 times)
- Row 8: (* P1, K1 * 3 times), * K8, P4, K4, P8 *, (* P1, K1 * 3 times)
- Row 9: (* K1, P1 * 3 times), * K9, P3, K3, P9 *, (* K1, P1 * 3 times)
- Row 10: (* P1, K1 * 3 times), * K10, P2, K2, P10 *, (* P1, K1 * 3 times)
- Row 11: (* K1, P1 * 3 times), * K11, P1, K1, P11 *, (* K1, P1 * 3 times)
- Row 12: (* P1, K1 * 3 times), * K12, P12 *, (* P1, K1 * 3 times)
- Row 13: (* K1, P1 * 3 times), * K12, P12 *, (* K1, P1 * 3 times)
- Row 14: (* P1, K1 * 3 times), * K12, P12 *, (* P1, K1 * 3 times)
- Row 15: (* K1, P1 * 3 times), * P1, K11, P11, K1 *, (* K1, P1 * 3 times)
- Row 16: (* P1, K1 * 3 times), * P2, K10, P10, K2 *, (* P1, K1 * 3 times)
- Row 17: (* K1, P1 * 3 times) * P3, K9, P9, K3 *, (* K1, P1 * 3 times)
- Row 18: (* P1, K1 * 3 times), * P4, K8, P8, K4 *, (* P1, K1 * 3 times)
- Row 19: (* K1, P1 * 3 times), * P5, K7, P7, K5 *, (* K1, P1 * 3 times)
- Row 20: (* P1, K1 * 3 times), * P6, K6 *, (* P1, K1 * 3 times)
- Row 21: (* K1, P1 * 3 times) * P7, K5, P5, K7 *, (* K1, P1 * 3 times)
- Row 22: (* P1, K1 * 3 times), * P8, K4, P4, K8 *, (* P1, K1 * 3 times)
- Row 23: (* K1, P1 * 3 times), * P9, K3, P3, K9 *, (* K1, P1 * 3 times)
- Row 24: (* P1, K1 * 3 times), * P10, K2, P2, K10 *, (* P1, K1 * 3 times)
- Row 25: (* K1, P1 * 3 times), * P11, K1, P1, K11 *, (* K1, P1 * 3 times)
- Row 26: (* P1, K1 * 3 times) * P12, K12 *, (* P1, K1 * 3 times)
- Row 27: (* K1, P1 * 3 times) * P12, K12 *, (* K1, P1 * 3 times)
- Row 28: (* P1, K1 * 3 times), * P12, K12 *, (* P1, K1 * 3 times)
Knit 7 Pattern Repeats of Rows 1 – 28 of the Parallelogram Stitch for the Lapghan Throw size.
196 Rows Parallelogram + 20 Rows Garter Borders = 216 Rows total.
_____
Step 4: Top Border in Seed Stitch
Rows 1, 3, 5, 7, 9: * K1, P1 *
Rows 2, 4, 6, 8, 10: * P1, K1 *
_____
Step 5: Cast Off
Cast Off all stitches
_____
Weave In Ends
Wet-Blocking Recommended: You may wish to block your work for best results.
Notes
Gauge: 12 stitches and 19 rows = 4 inches in Seed Stitch Pattern
Rows 1 & 2: * K2, P2 *
Rows 3 & 4: * P2, K2 *
_____
KNITTING TECHNIQUES
- Slip Knot
- CO = Cast On Long Tail Method
- K = Knit Stitch
- P = Purl Stitch
- BO = Bind Off
- Weave In Ends

Kristen McDonnell
Author • Designer • Teacher
Kristen from StudioKnit LLC produces knitting video lessons and pattern designs from her vibrant production studio on Half Moon Bay’s California coast.
Kristen McDonnell is the author of the highly acclaimed book Knit Stitch: 50 Knit + Purl Patterns featuring vintage and unique designs.

