How to Hand Knit with Loop Yarn
It is so easy to learn how to hand knit with Loop Yarn! See exactly how to knit and purl knitting projects with my close-up photo and video tutorials below. Then, continue reading to get my free knitting pattern instructions to create a quick headband and a small blanket.
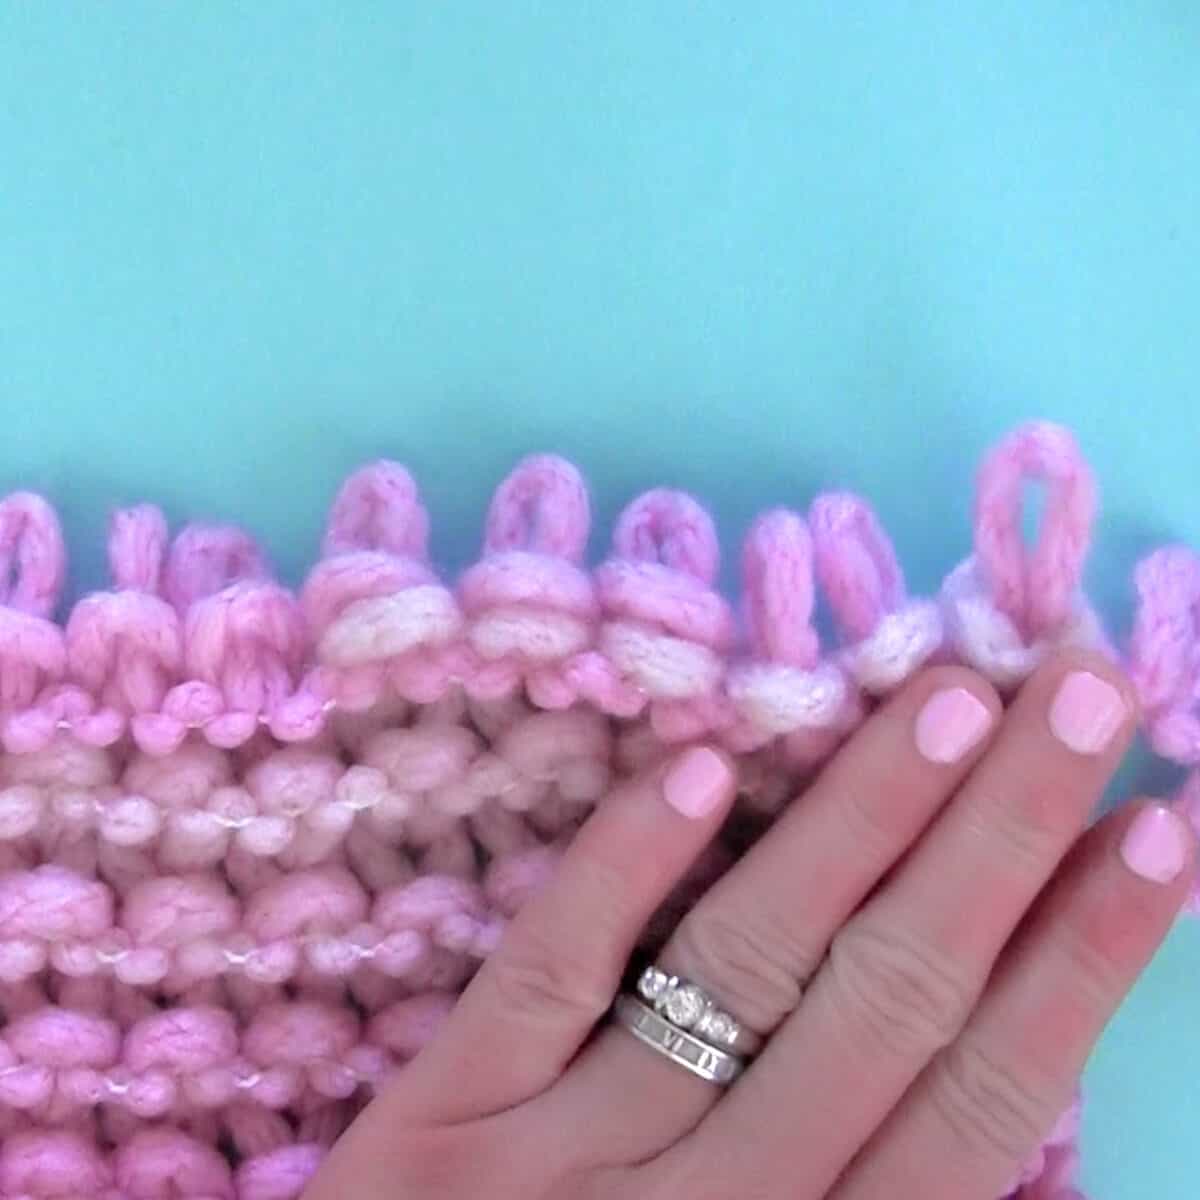
Creative people of all ages and skill levels will have fun learning to make cozy knitted projects with this fun yarn.
This is a great crafty project to get the entire family involved and I enjoy being able to easily share the concept of knitting with kids using it, too. If you’re curious, no matter your knitting skill level, I encourage you to pick up a ball of this easy yarn and give it a try!
Table of Contents
Loop Yarn Brands
As this yarn gains in popularity, more brands have been creating new products. Here are some of my favorites, readily available to purchase online.
As an Amazon Associate, I earn from qualifying purchases.
Bernat Alize Blanket-EZ Yarn – Shop Various Colors on Amazon
Loop-It by Red Heart – Shop Various Colors on Amazon
Off the Hook Yarn by Lion Brand – Shop Various Colors on Amazon
Watch Video Tutorial
How to Begin Knitting with Loop Yarn
Begin by placing one strand on a smooth surface and count out the desired number of stitches. When working with this type of yarn, you never turn your work, as you would when traditionally knitting. Just keep your piece on your flat surface the entire time.
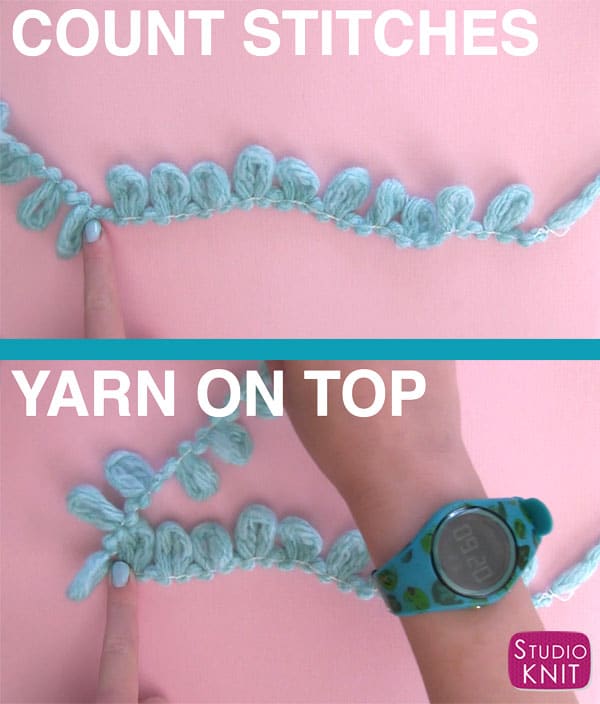
HELPFUL TIP: The best way to quickly understand how to knit with this yarn is to watch our entire video above.
How to Knit Stitch with Loop Yarn
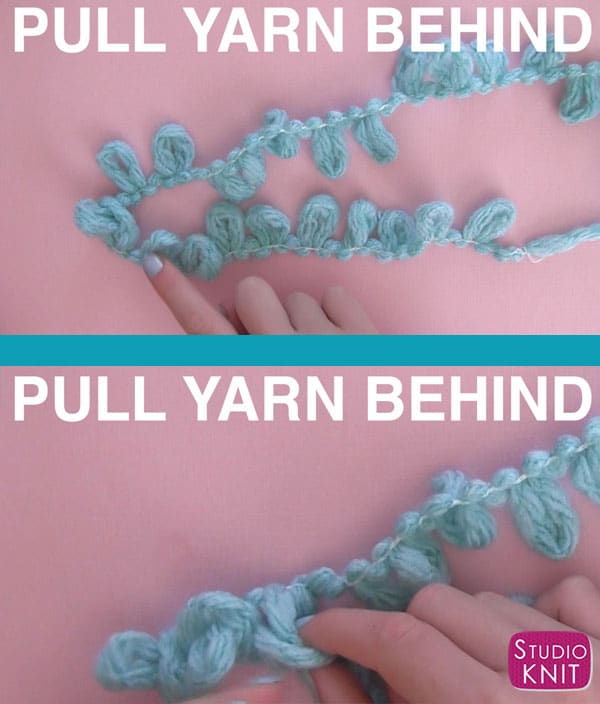
The rest of the yarn that is attached to your yarn ball is called your working yarn. Place your working yarn with one strand on top. Take the first loop from your working yarn and insert it from behind and through the last loop you counted out. This is called a Knit Stitch.
If you like, you can continue placing your working yarn on the top of your piece and continue knitting. This will give you the knit stitch pattern called Stockinette Stitch.
How to Purl Stitch with Loop Yarn
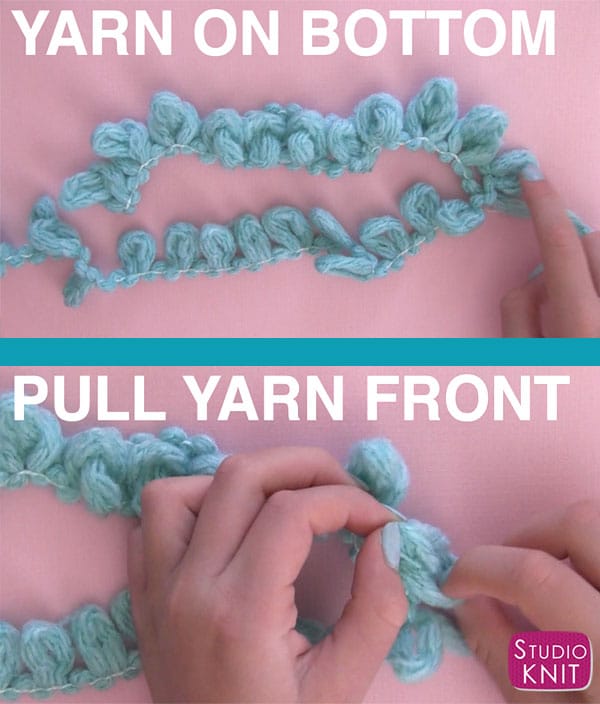
If you would like to create the Garter Stitch pattern as we have for our knitted projects, then every other row you will do things a little differently. Take your working yarn and place it below your piece. Then take the first loop from your working yarn and insert it from the front and through the loop above.
For the Garter Stitch, you will repeat these instructions for the Knit and Purl stitches.
How to Join Loop Yarn
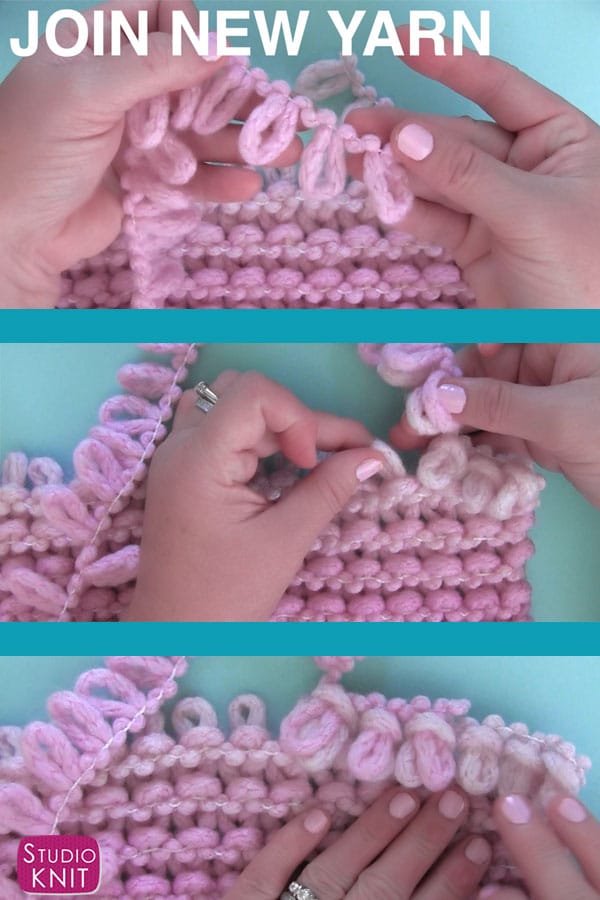
If you would like to add more yarn once you complete knitting an entire ball of yarn, it’s really simple. Stop when you have 3 loops remaining on your old yarn. Then place the first 3 loops of your new yarn on top of them. Insert both of these stacked loops into your piece as you normally would, then continue knitting.
When you come back around, simply insert through those stacked loops. This will securely join both yarn balls into your work.
How to Finish Knitting
To finish your piece, you will do something called Casting Off in knitting. You knit your first 2 loops as you normally would. Then insert that second loop into the first loop from the front to the back. Next, knit the 3rd loop and insert that loop into the one prior.
Again, it makes complete sense when you can see it in action in our video!
Headband Knitting Pattern in Garter Stitch
My niece knitted a quick-knit headband. Here’s her easy pattern:
- Count out 30 Loops (or size for your head).
- Row 1 – Knit Stitch. Place your working yarn on top, pull the new loop through back of the loop to the front.
- Row 2 – Purl Stitch. Place your working yarn on bottom, pull new yarn loop through the front of the loop to the back.
- Row 3 – Knit Stitch. Place your working yarn on top, pull the new loop through back of the loop to the front.
- Row 4 – Place your working yarn on the bottom, pull new yarn loop through front of the loop to the back.
- Bind Off.
- Cut Yarn.
- Weave Yarn to seam ends together.
Blanket Knitting Pattern in Garter Stitch
I am knitting a small blanket for my dog. Here is the easy knitted blanket pattern that uses about one and half balls of yarn.
- Count out 26 Loops (or width desired)
- Row 1 – Knit Stitch. Place your working yarn on top, pull the new loop through back of the loop to the front.
- Row 2 – Purl Stitch. Place your working yarn on the bottom, pull new yarn loop through the front of the loop to the back.
- Repeat Rows 1 and 2 until your blanket is the length you desire
- Bind Off
- Cut Yarn
- Weave Yarn end through your blanket

Kristen McDonnell
Author • Designer • Teacher
Kristen from StudioKnit LLC produces knitting video lessons and pattern designs from her vibrant production studio on Half Moon Bay’s California coast.
Kristen McDonnell is the author of the highly acclaimed book Knit Stitch: 50 Knit + Purl Patterns featuring vintage and unique designs.


